How to change fonts in Weebly
 By David Nge | Last Updated: September 25, 2024
My work is supported by affiliate commissions. Learn More
By David Nge | Last Updated: September 25, 2024
My work is supported by affiliate commissions. Learn More
Here's a step-by-step tutorial on how to change and add a custom font in Weebly.
In this guide we'll go over:
You will be able to change and apply a custom font to your website text elements by the end of this tutorial.
Let's dive right in.
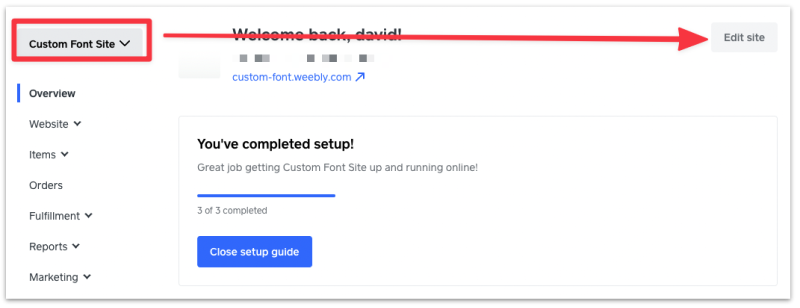
First login to your Weebly account. Make sure you select the correct website and click Edit Site.
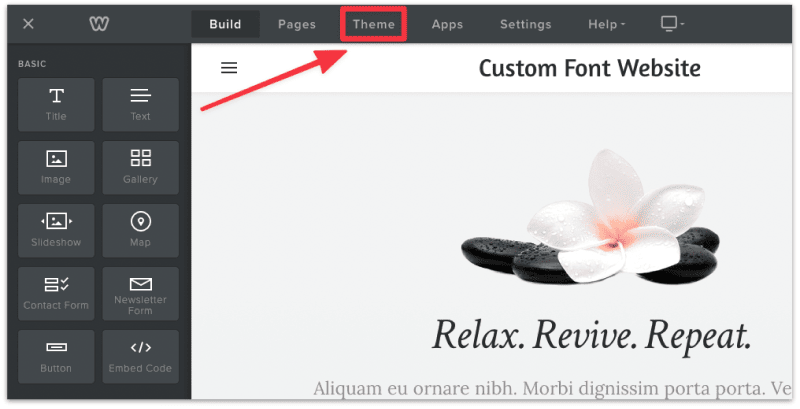
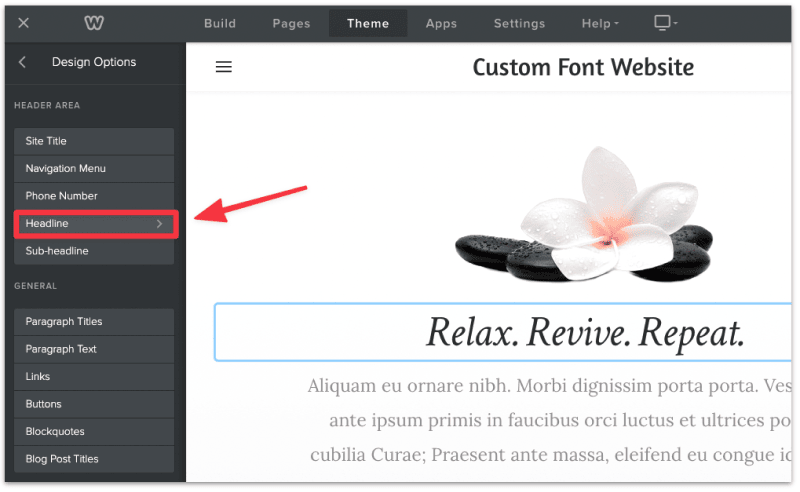
Next, click Theme. You will find it at the top navigation.
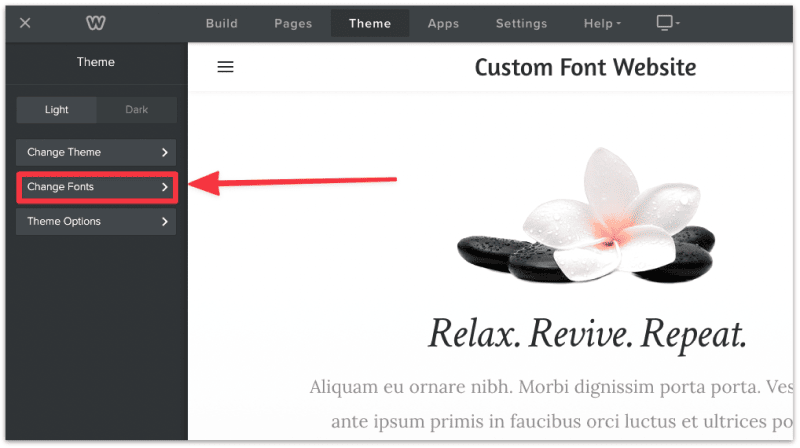
On the left sidebar, you'll see a list of options to customize your theme. Click into Change Fonts.
You should now see a list of design options to customize the font choices.
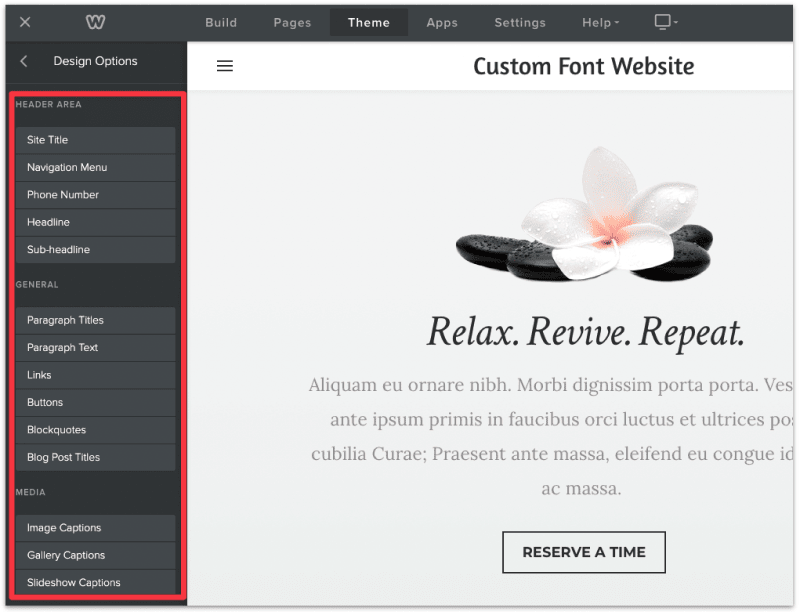
Important: When you change the font for any of the text elements, the changes are applied throughout the entire website. So if you choose a new font for the paragraph text on one page, all paragraphs (across all pages) on your site will use that same font. The same goes for buttons, links, headlines, image captions, etc.
Is there a way to customize the font for a specific text element?
Yes, there is. But, it's more tedious to do so. Click here to skip to the last section on how to set a custom font for one specific text element.
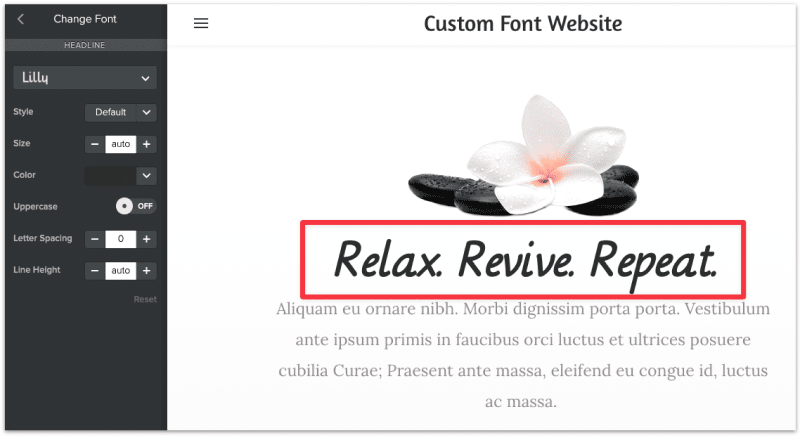
Select the text element and the font you want to change.
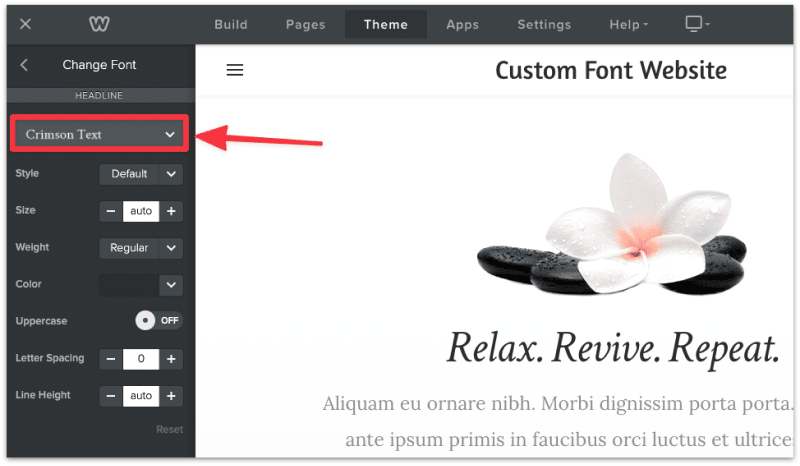
The text font should now be updated.
While Weebly has hundreds of fonts to choose from, if you can't find a font you're after or if you need a specific font for your client then this guide will show you how to upload a custom font in Weebly.
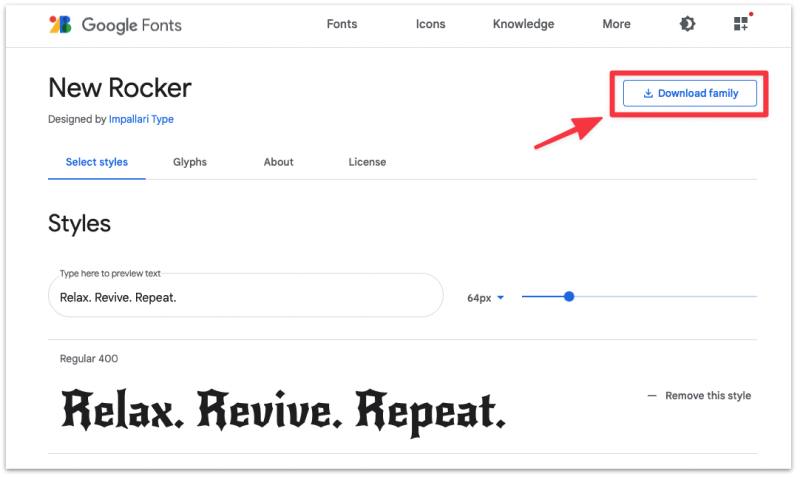
First, you should already have access to custom font files on your computer/mobile. If you don't have one, here's a unique Google font you can download for this tutorial.
Then head to the Weebly Theme settings again and select Edit HTML/CSS.

You are now looking at the code editor for your Weebly theme. While it can look intimidating for a beginner, just follow the steps below and you should be fine.
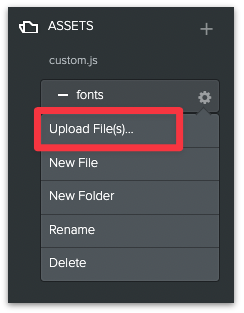
First, click the + button next to ASSETS, create a folder and name it fonts.
Click the gear icon (⚙️) and upload the Google Font that you've just downloaded into the fonts folder.
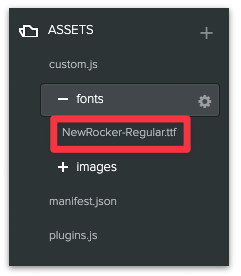
You should now see the new font added into the folder.
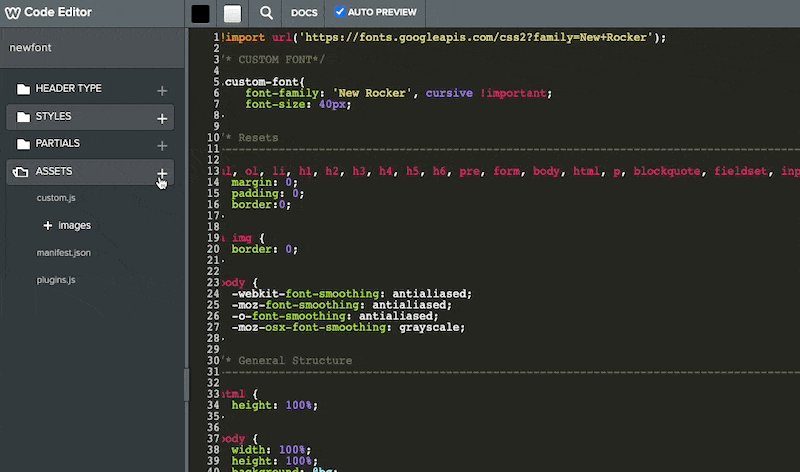
In order to use the new custom font, copy and paste the following code to the top of the editor.
@font-face {
	font-family:'New Rocker';
	src: url('assets/fonts/NewRocker-Regular.ttf');

}
Notes:
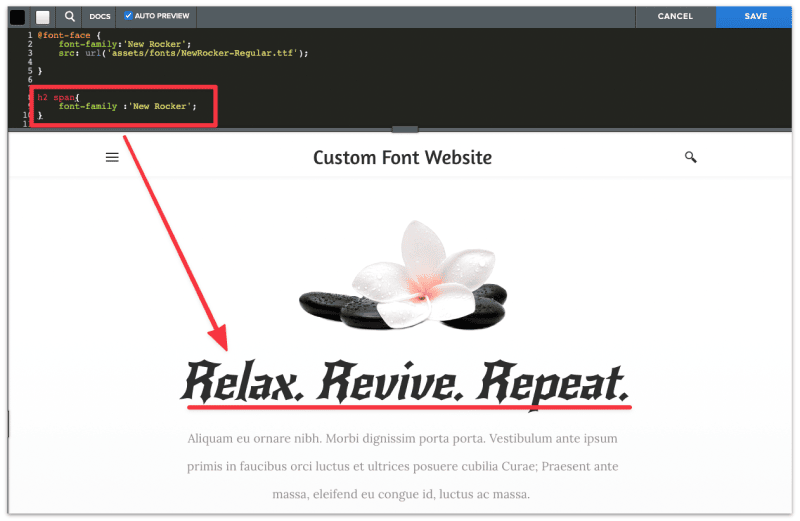
Now whenever you want to use the new font, you have to add font-family to the HTML text element you want to change.
For example, we want to change the font of the header to the new Google font we've downloaded.
In order to do that I have to add the following code the to editor:
h2 span{
	font-family :'New Rocker';
}
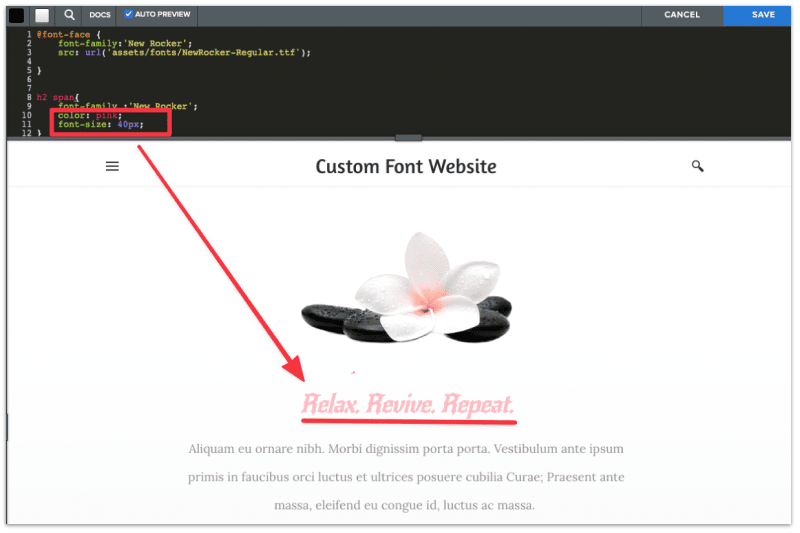
You can also change the color and the size of the font by adding a few snippets of code.
I understand that using the new custom font requires some basic coding knowledge. Unfortunately at the moment, this is the only way to use custom font in Weebly.
If you'd like to invest some time learning basic coding skills, this video tutorial by FreeCodeCamp is a great start. It's an investment that will benefit you for years to come if you want to customize any website in the future.
In order to change the font for a specific text in Weebly we have to utilize the Embed Code feature.
The Embed Code feature allows you to add custom HTML code to the page which you can manipulate in the code editor later.
Here's an example.
Delete the original header, and drag the Embed Code page element to replace it.
Click on the new element and select Edit Custom HTML. You can optionally align the new element to a center position.
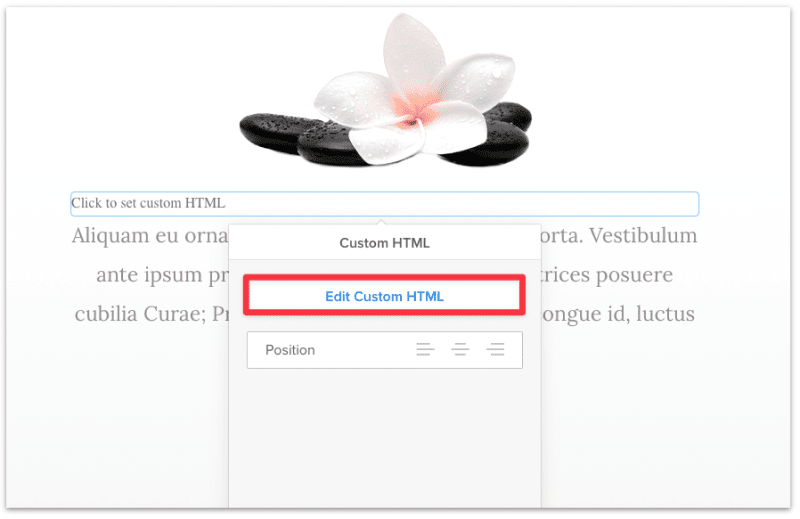
Then add the following code in the text field.
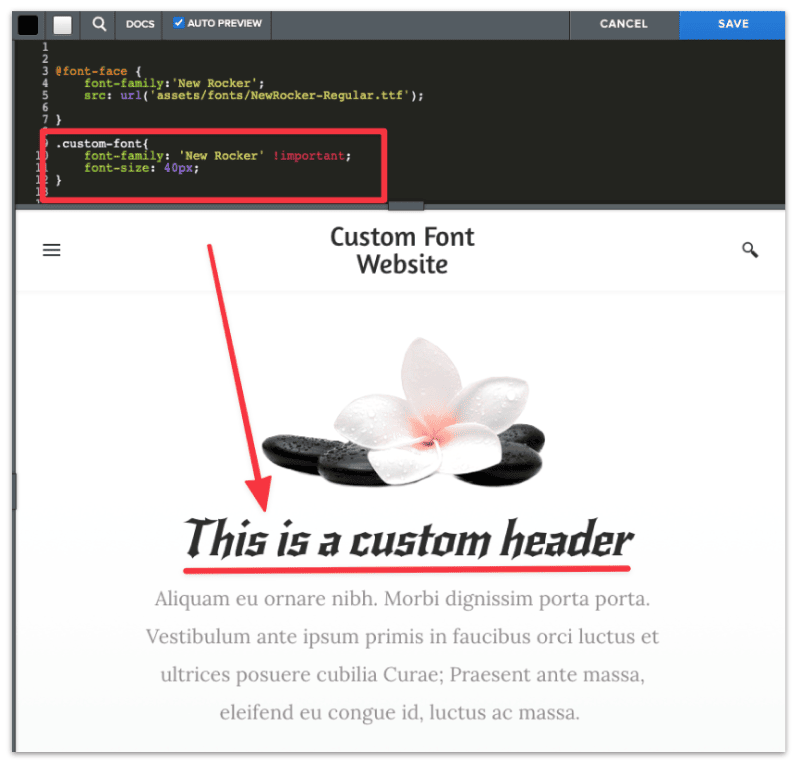
<h2 class="custom-font">This is a custom header</h2>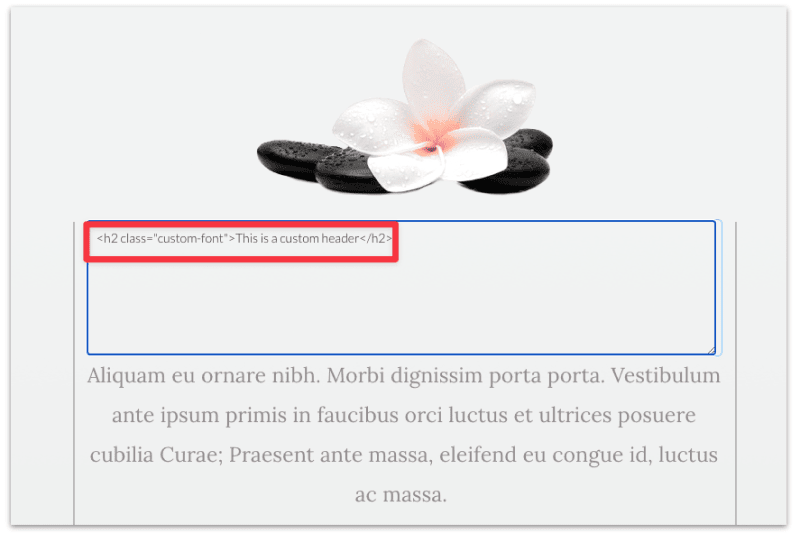
You may replace "This is a custom header" to whichever text you like.
Head back to the Theme settings again and select Edit HTML/CSS.
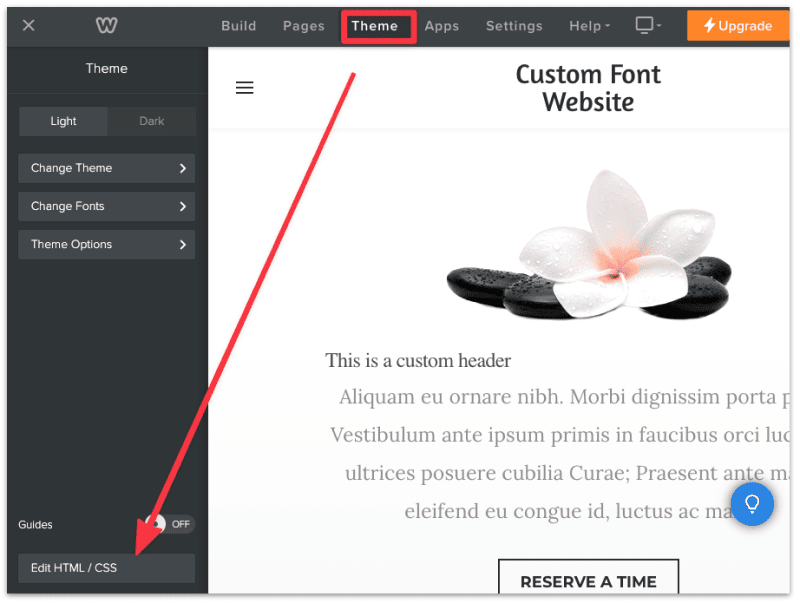
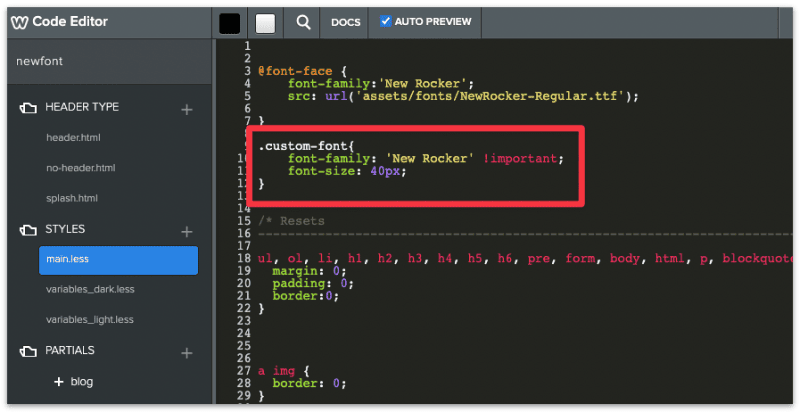
Add the following code in the editor.
.custom-font{
	font-family: 'New Rocker' !important;
	font-size: 40px;
}
Note:
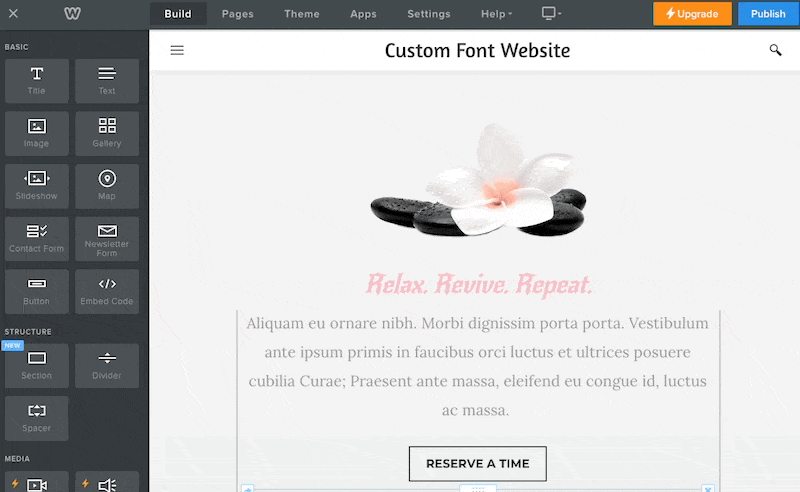
You have now successfully add a custom font to the header!
You can also use this method on any section of the page, be it a paragraph, button text, navigation, or blog post articles.
Although, that would require some basic coding knowledge. Since it is out of the scope of the article, you can check out this tutorial to learn some basic coding skills.
David Nge is the founder and writer behind MakingThatWebsite.com. Since launching in 2021, he’s been on a mission to help non-techies—especially small business owners—build better websites using easy-to-learn tools and smart, time-saving strategies. He specializes in website builders, SEO, and practical AI tutorials for small business owners.
Have a tutorial you want to learn? Leave a suggestion here.