How to add custom font in Squarespace 7.1
 By David Nge | Last Updated: October 04, 2024
My work is supported by affiliate commissions. Learn More
By David Nge | Last Updated: October 04, 2024
My work is supported by affiliate commissions. Learn More
Here's a step-by-step tutorial on how to add a custom font in Squarespace.
In Summary, we'll go over:
By the end of this tutorial you will have successfully applied custom font on your site.
Let's dive right in.
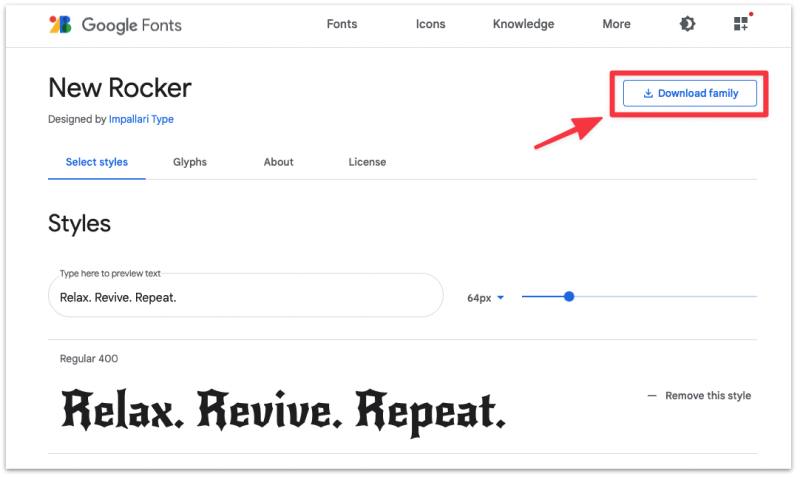
First, you should already have access to custom font files on your computer/mobile. If you don't have one, here's a unique Google font you can download for this tutorial.
Then login to your Squarespace account and select a site to edit.

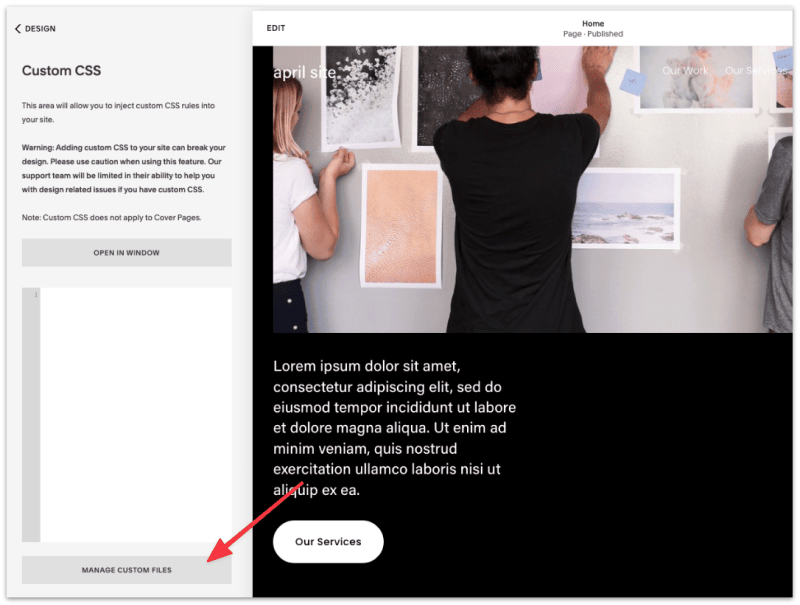
On the left panel, select Design ➞ Custom CSS.


In the Custom CSS dashboard, select Manage Custom Files.
Drag your custom font(s) into Squarespace's file manager.

You should see the custom font is now uploaded.

In the Custom CSS dashboard (Design ➞ Custom CSS), we need to add the following CSS code to the editor.
@font-face {
    font-family: xxxx;
       src: url(xxxx);
  }
Over here, we are informing Squarespace we're adding a new font (font-family) and where the file is uploaded (src aka the source).
Go ahead and replace "xxxx" with the name of the font and the URL where the font is located.

Note: While editing the code, make sure you delete the dummy text "xxxx" before you add the name and the URL.
You've now added a new font in Squarespace!
But, you won't see any changes yet because we need to define what text and in which area of the site we want to use the new custom font.
To change the headline with the new custom font, add the following code to the CSS editor.
h1 {
  font-family:new rocker !important
}Note: Replace "new rocker" with the font name you added for your own custom font.

Once added, Squarespace should automatically update the page to preview your new font.
Add the following code to change the fonts on the subheadlines.
h2, h3, h4, h5, h6 {
  font-family:new rocker !important
}
If you notice a pattern, h1 is the code reference for the main headline while h2-h6 are for the subheadlines. The higher the number the smaller the size of the subheadlines.
You can change as many or as little subheadlines.
h2, h4, h6 {
  font-family:new rocker !important
}
You can also use different custom font for each of the headline/subheadline.
h1 {
  font-family:old rocker !important
}

h2, h4, h6 {
  font-family:new rocker !important
}This is applicable to blog, home page, or any other pages where the majority of the text is written.
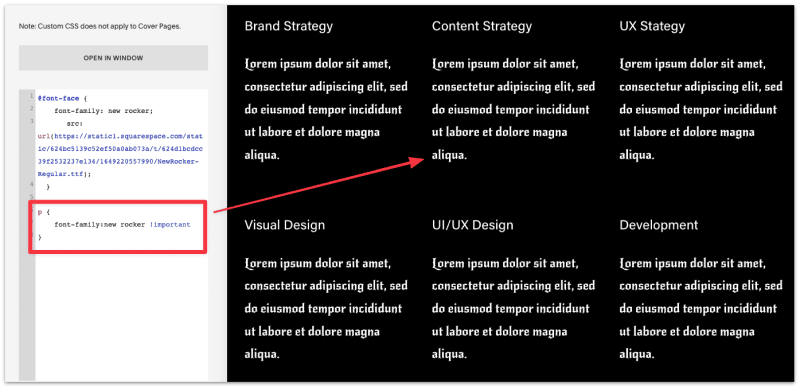
Add the following code to change the fonts for all paragraphs on your site.
p {
    font-family:new rocker !important
}
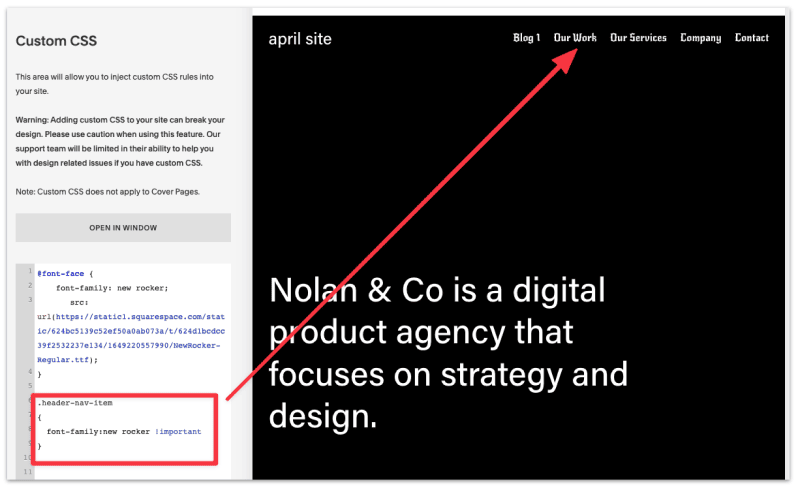
Add the following code to change the fonts on the navigation menu.
.header-nav-item
{
  font-family:new rocker !important
}
Again, replace "new rocker" with the font name you added for your own custom font.
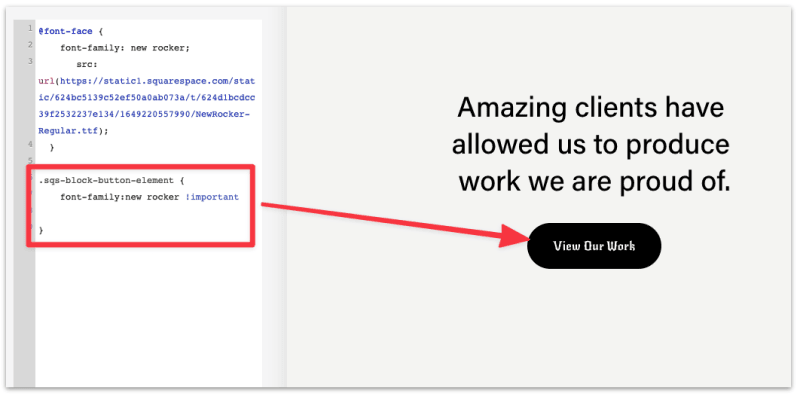
Add the following code to change the fonts on the buttons.
.sqs-block-button-element {
    font-family:new rocker !important
}
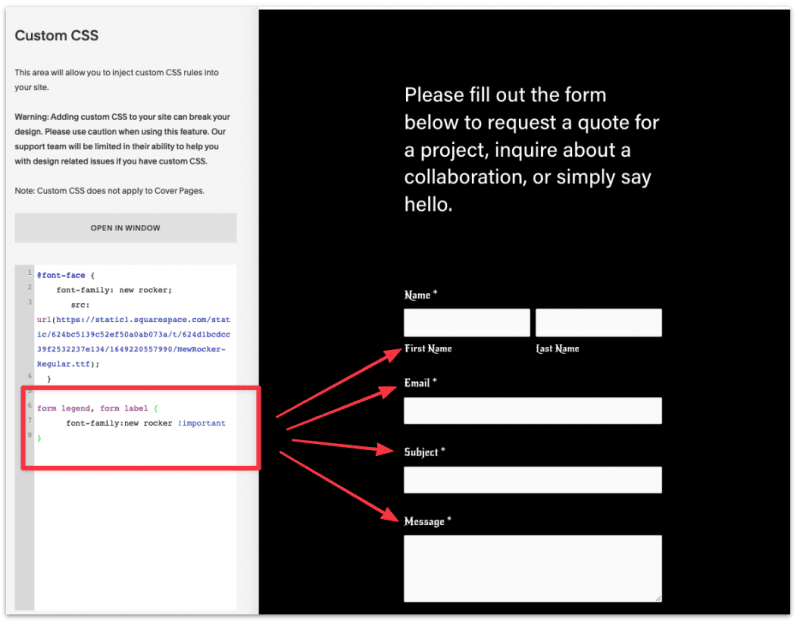
Add the following code to change the fonts on the form labels.
form legend, form label {
      font-family:new rocker !important
}
With access to custom CSS, Squarespace allows you to customize not just the fonts but virtually every part of the site as well, but this is out of the scope of this tutorial at the moment.
Although, with the right fonts you still can do a lot of damage ;)
Do you have feedback or suggestion on what I should write about? Submit here!
David Nge is the founder and writer behind MakingThatWebsite.com. Since launching in 2021, he’s been on a mission to help non-techies—especially small business owners—build better websites using easy-to-learn tools and smart, time-saving strategies. He specializes in website builders, SEO, and practical AI tutorials for small business owners.
Have a tutorial you want to learn? Leave a suggestion here.