How to integrate Thinkific with your Squarespace site
 By David Nge | Last Updated: July 28, 2023
My work is supported by affiliate commissions. Learn More
By David Nge | Last Updated: July 28, 2023
My work is supported by affiliate commissions. Learn More
Here's a step-by-step tutorial on integrating Thinkific with your existing Squarespace site.
If you already have a Squarespace site and simply want to host your course on Thinkific, follow these steps for a smooth student experience. They won't even realize they're switching to another site!
There are 3 ways to integrate Thinkific on your Squarespace site:
By the end of this tutorial, you will have successfully linked Squarespace to your Thinkific course.
Let's get started.
The simplest option to link Thinkific to your Squarespace site is to add it to your site navigation.
Here's an example to illustrate.
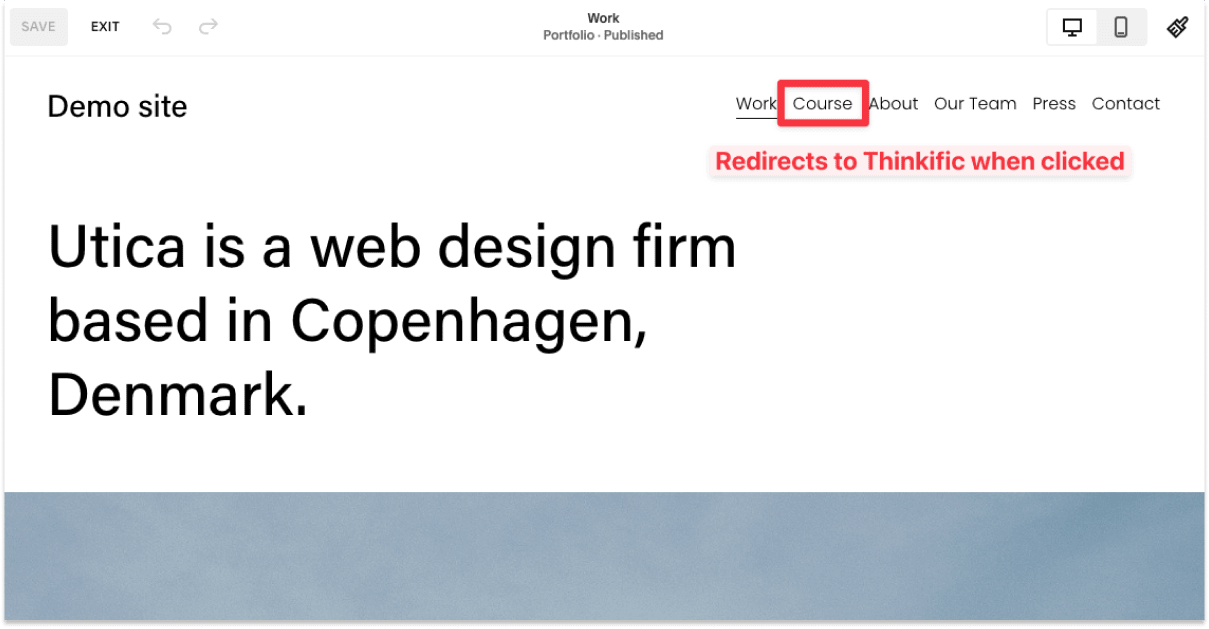
You add your Thinkific course page link to your site navigation so that when a user clicks on that link, they will be redirected to the Thinkific to learn more about your course.
How to add Thinkific to your site navigation
1. First, log in to your Thinkific course admin and head to Design your site ➝ Site Pages.
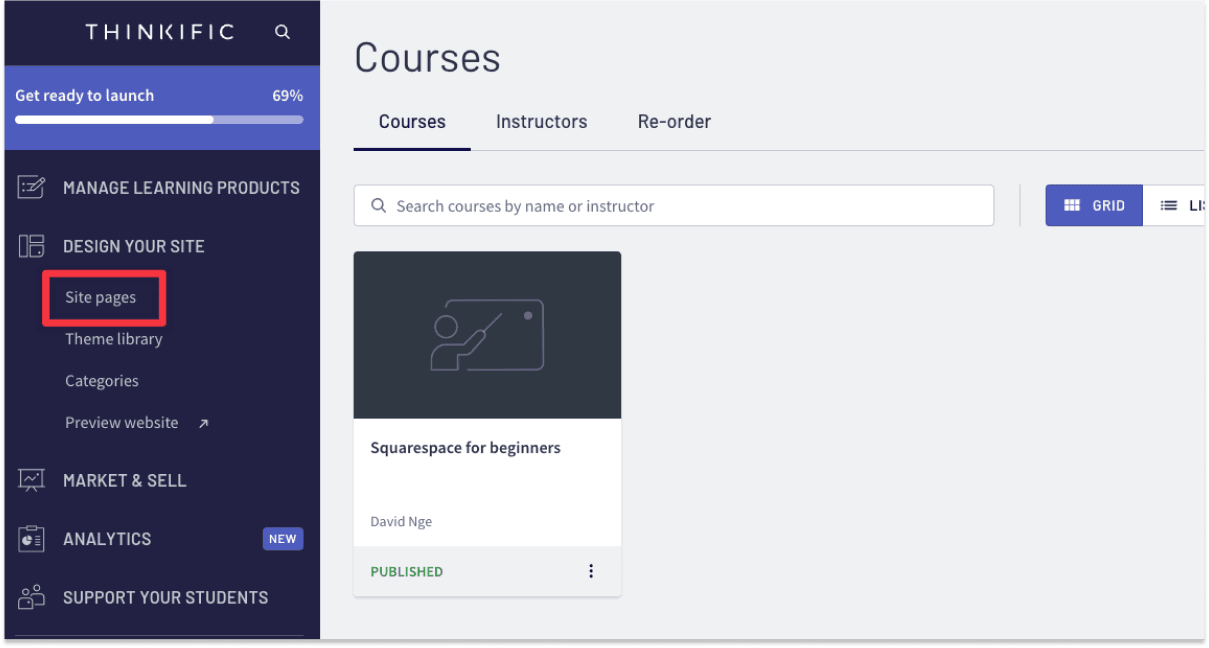
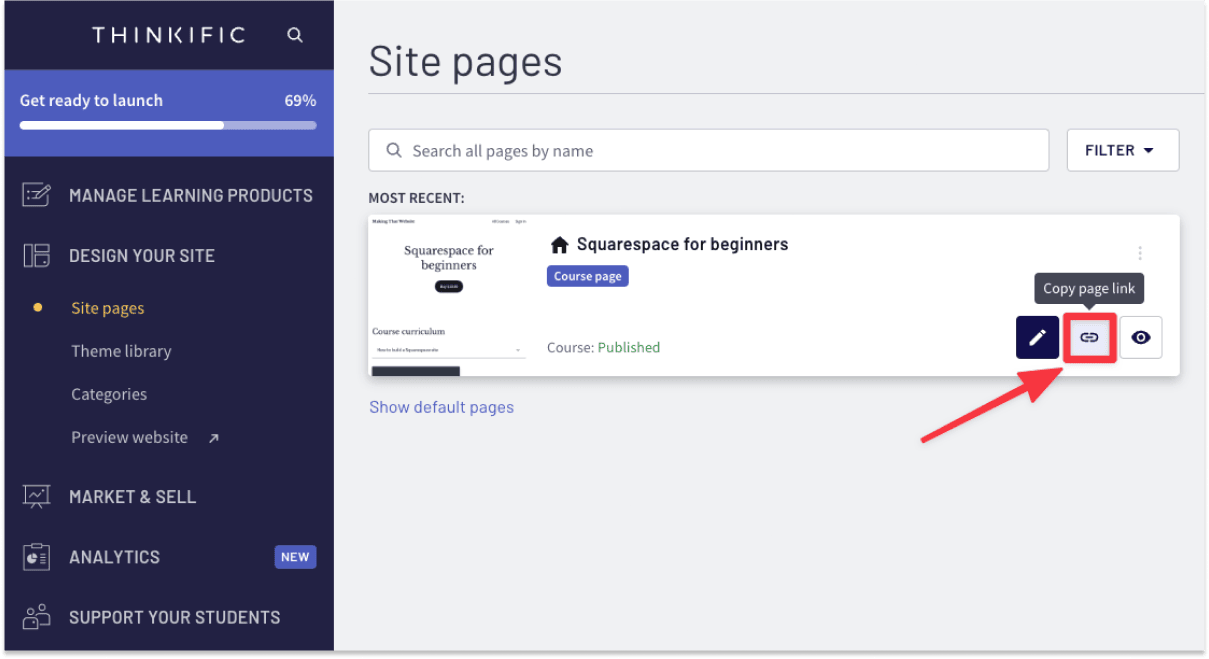
2. Copy the page URL of the course you want to link from your site. Save this URL in a notepad or text editor. You will need this in the later step.
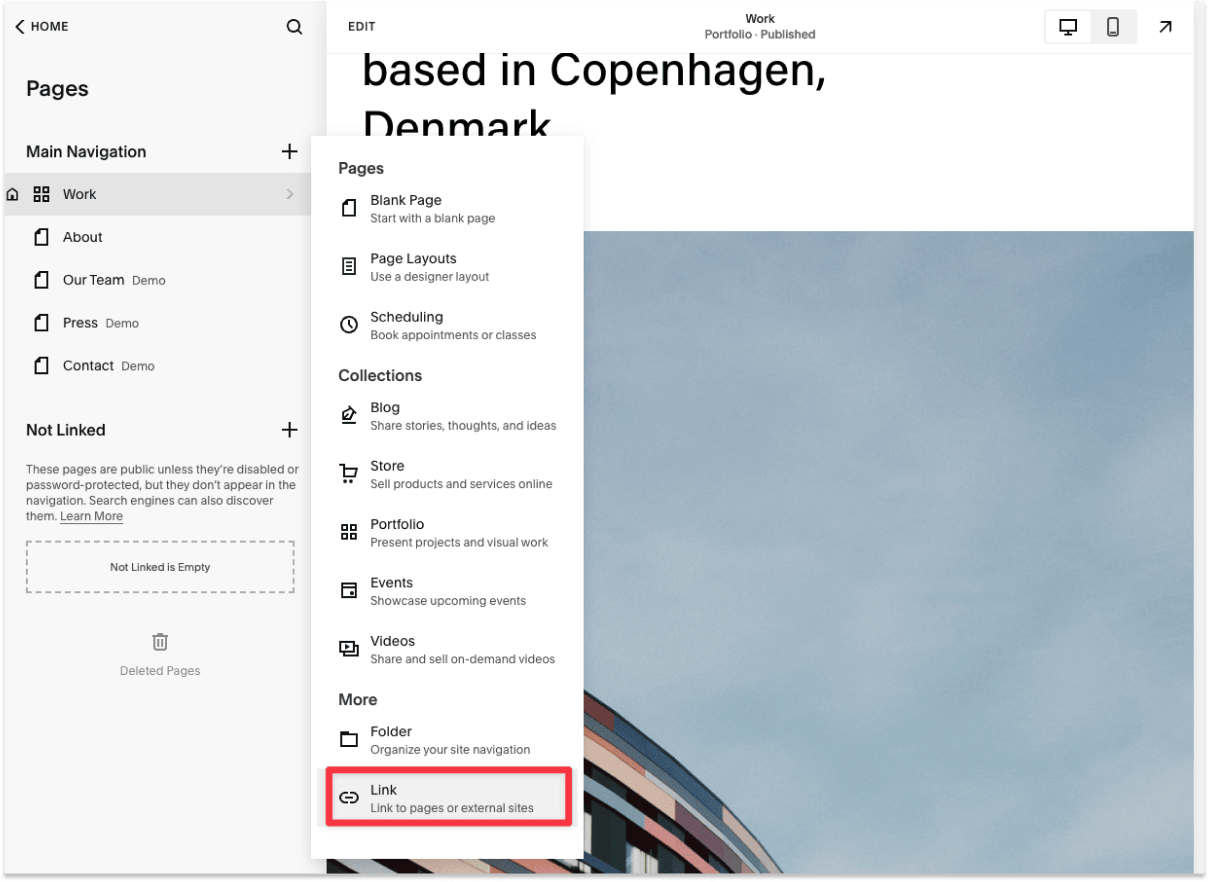
3. Log in to your Squarespace account dashboard and head to the Site admin ➝ Pages.
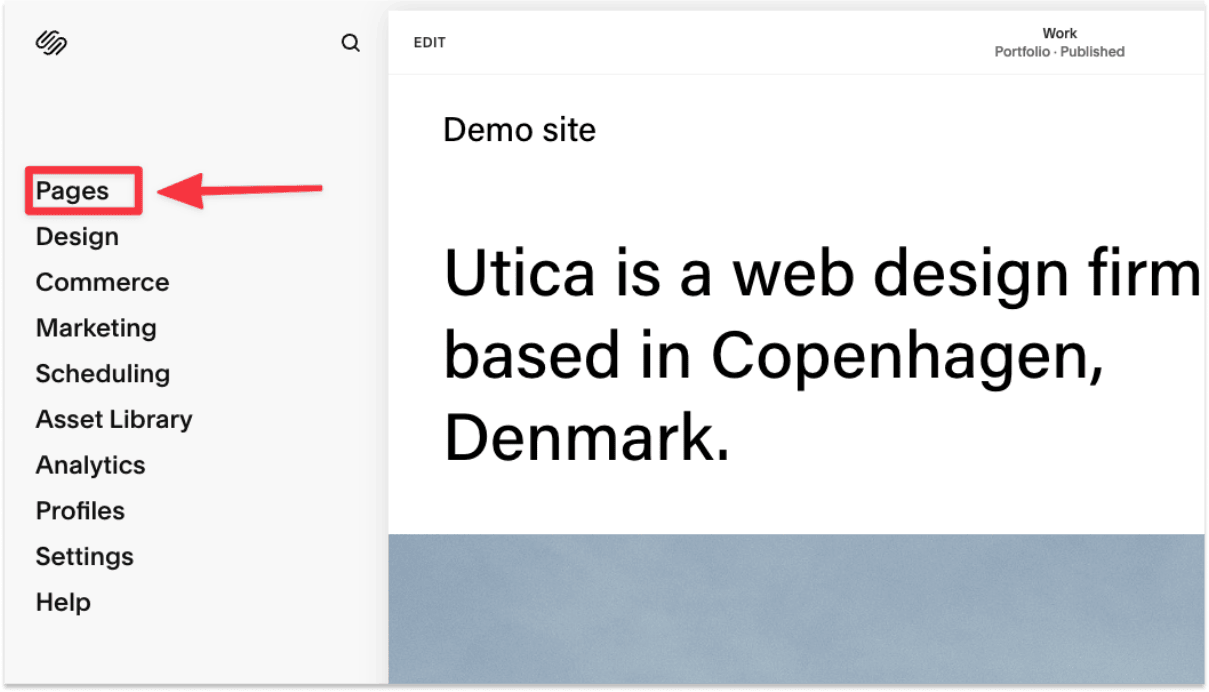
4. Add a New Link under Main Navigation and paste your Thinkific course page URL here. Don't forget to give it a title too.
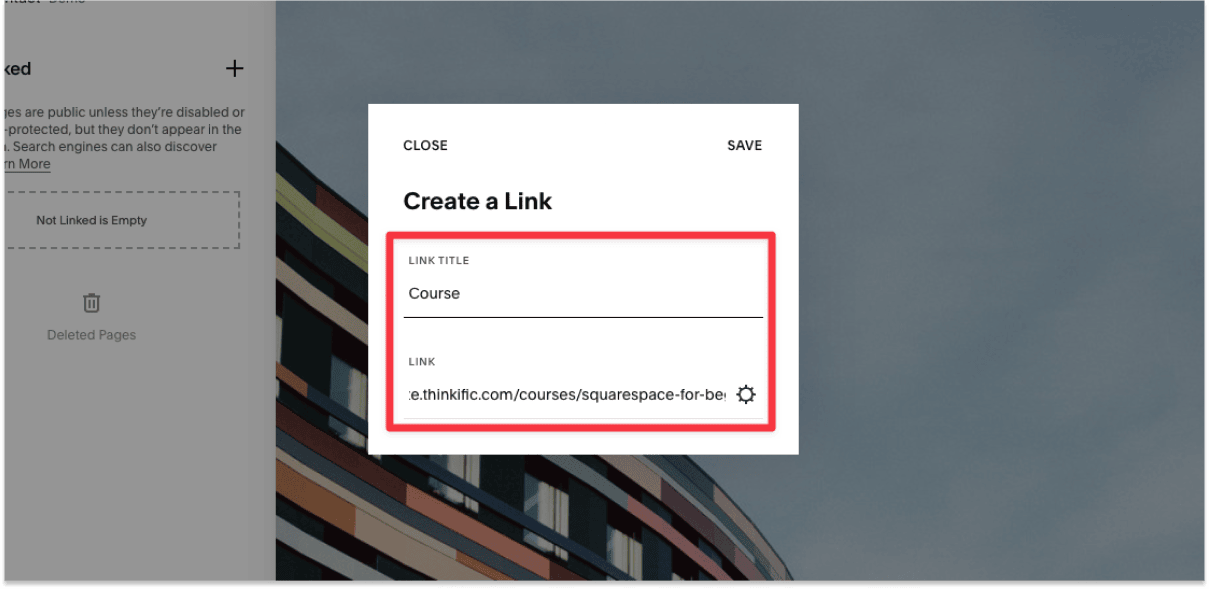
Once you're done, click Save.
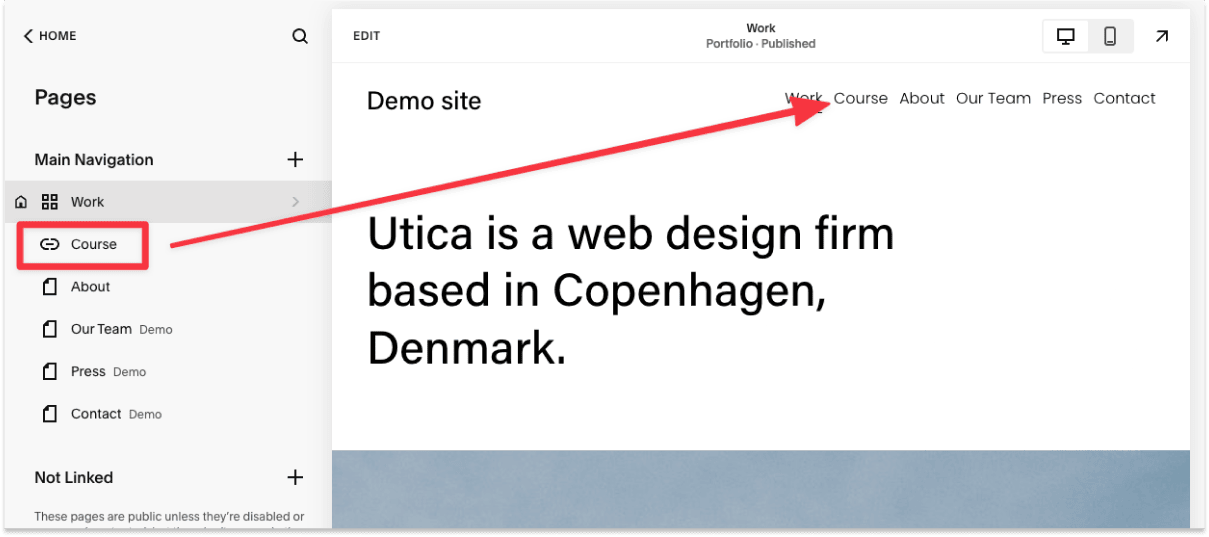
That's it! Your course page is now linked from the site navigation.
The second option is to your Thinkific checkout directly from your course landing page in Squarespace.
The main reason you want to do this is to have full control of your course page design.
Admittedly, Squarespace has a far superior page editor that allows you to customize your course page. And when customers are ready to buy, they can click the "Buy button" that links to the Thinkific checkout.
Here's what it looks like.
How to add Thinkific checkout to your site
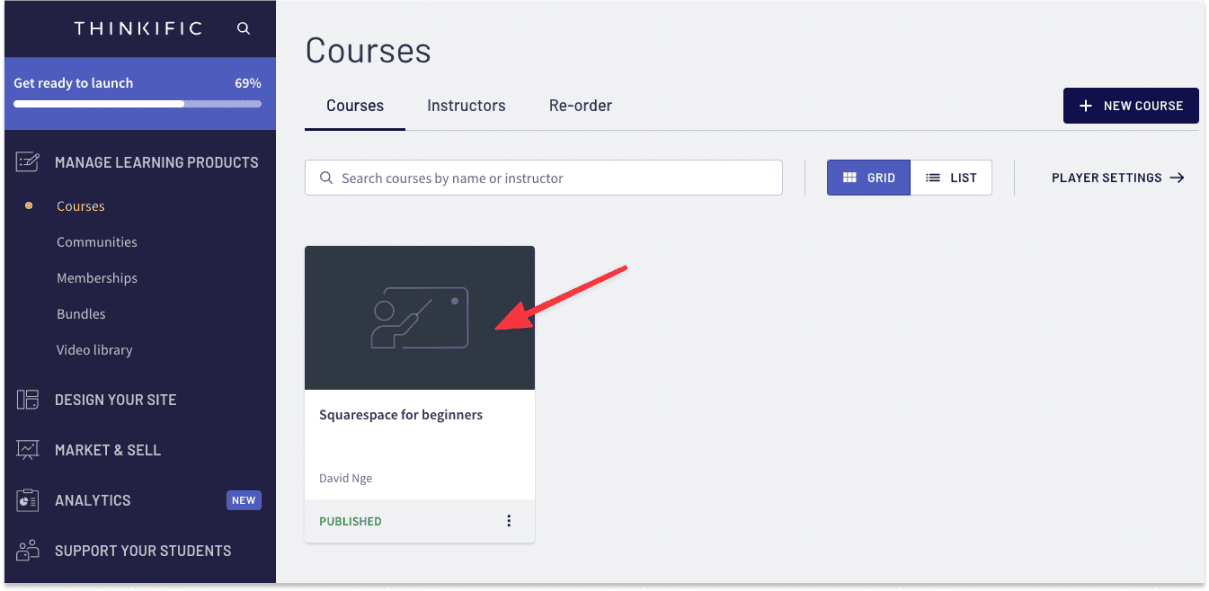
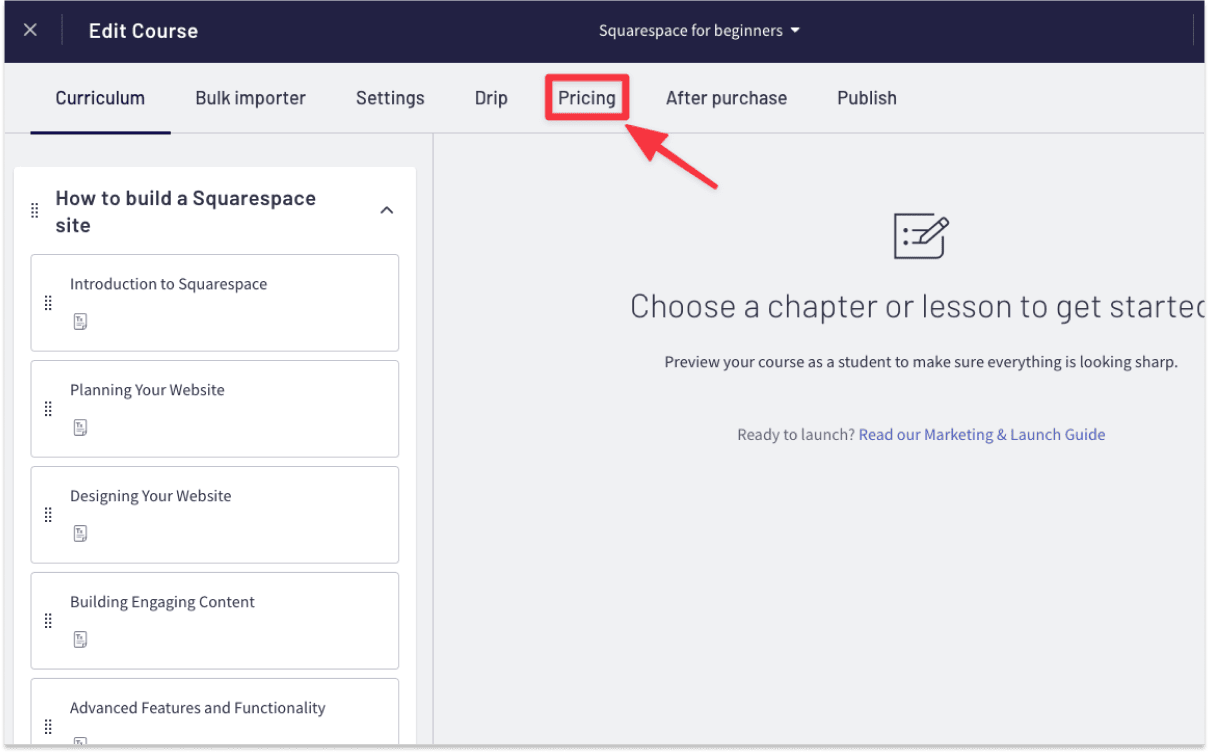
1. Head to your Thinkific course admin, then select Course ➝ Pricing.
2. On the Pricing page, copy the checkout URL for your course.
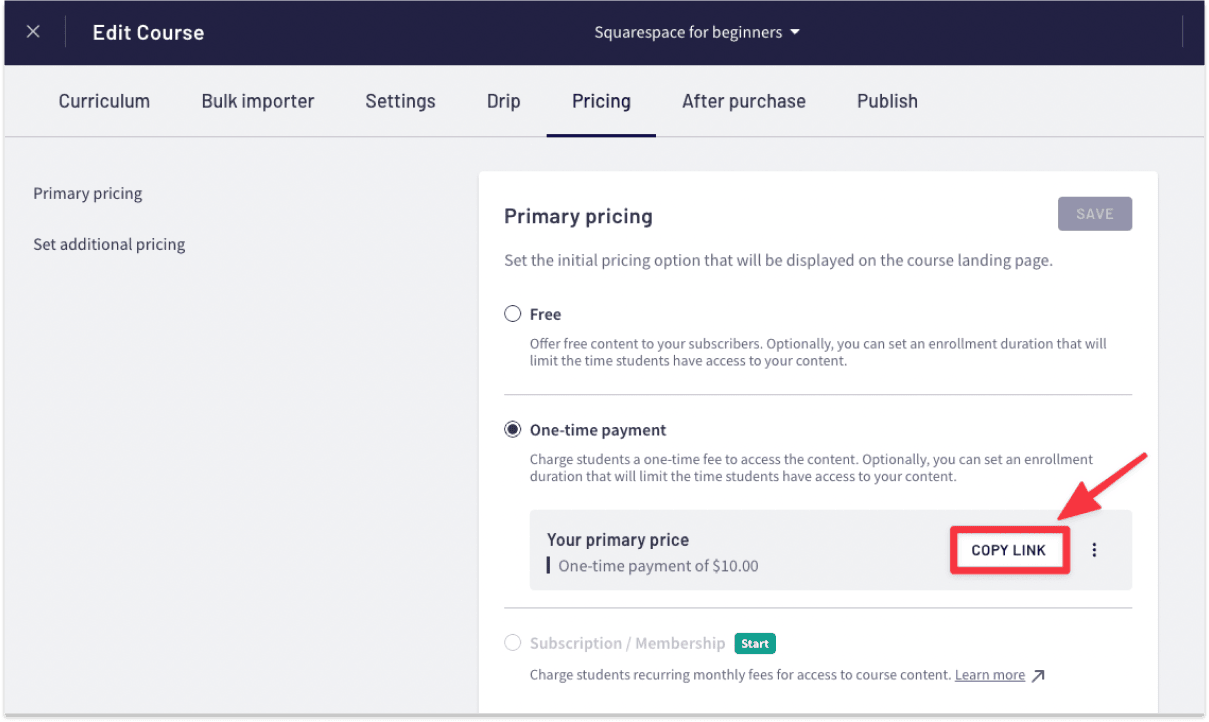
Note: You will need to set up the payment method and complete your course outline prior. Otherwise, the Copy button will be disabled.
3. Log in to your Squarespace account dashboard, head to the site admin, and edit your site. It is assumed that you've already created your course landing page.
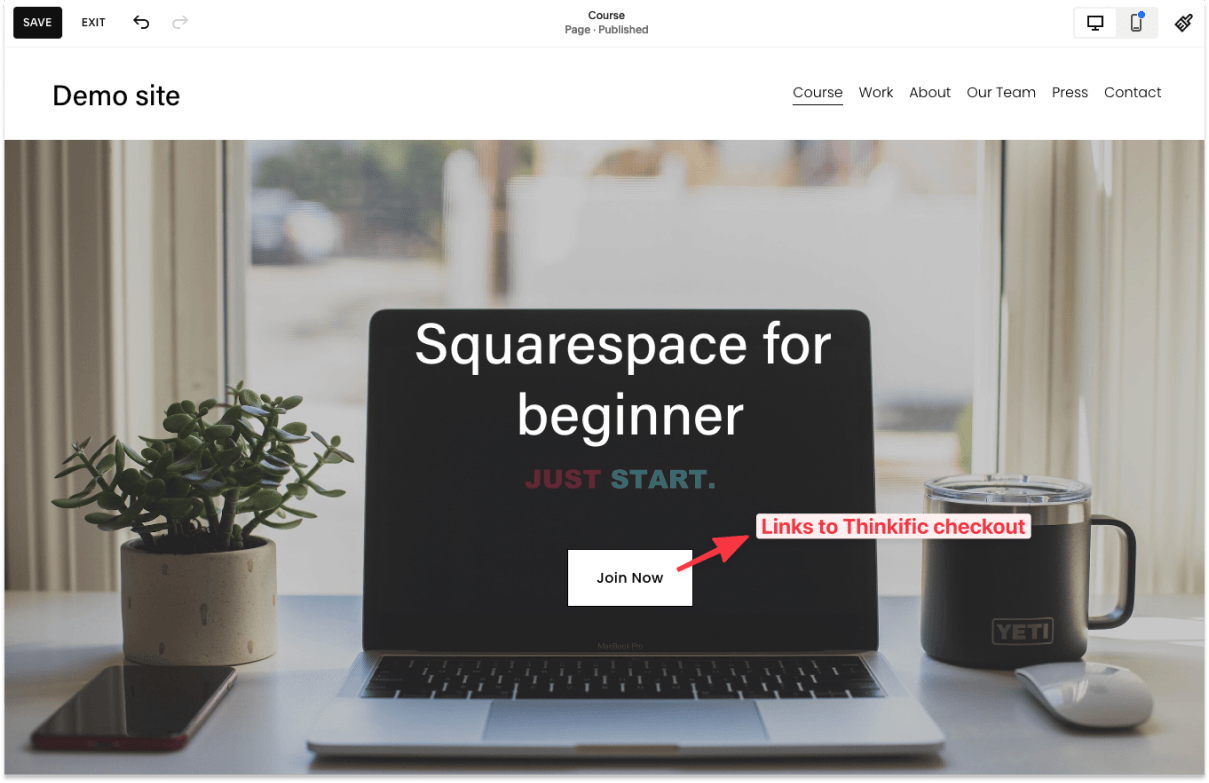
4. On your course landing page, edit the Join now button and add your Thinkific checkout URL here.
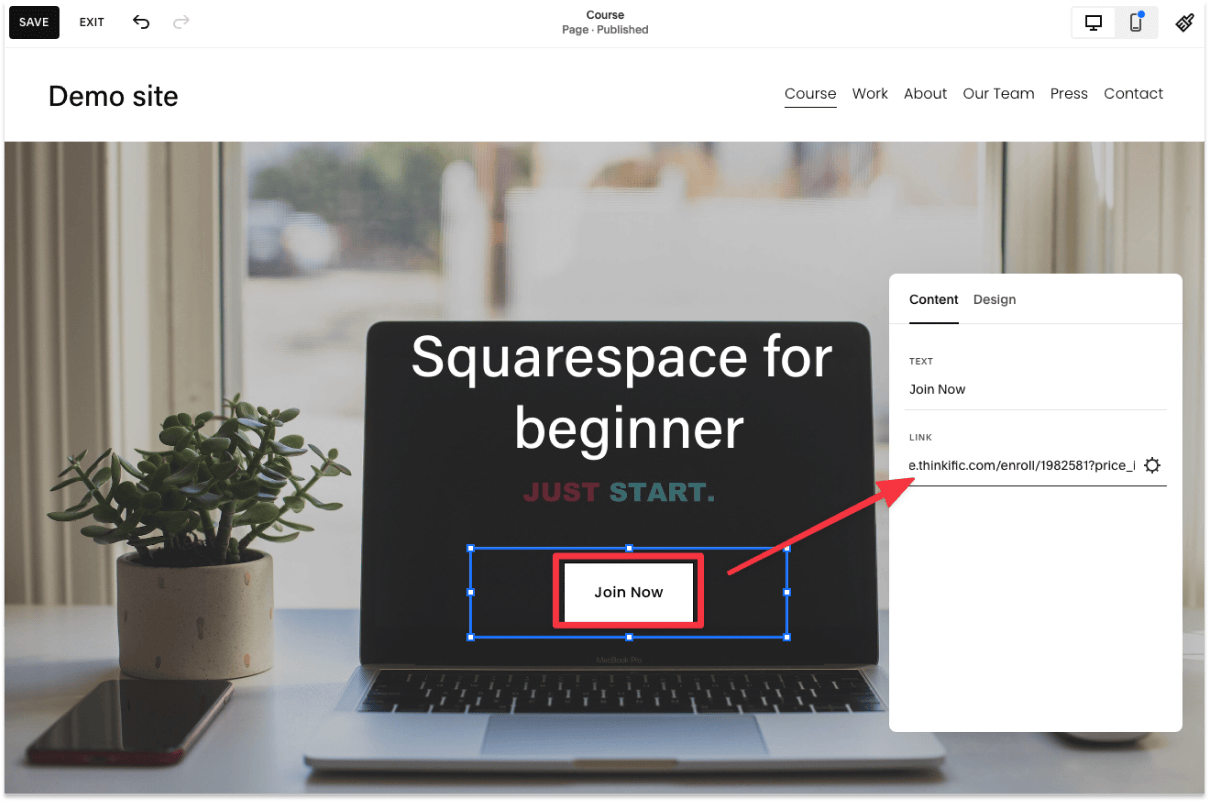
Save the changes, and you're all set.
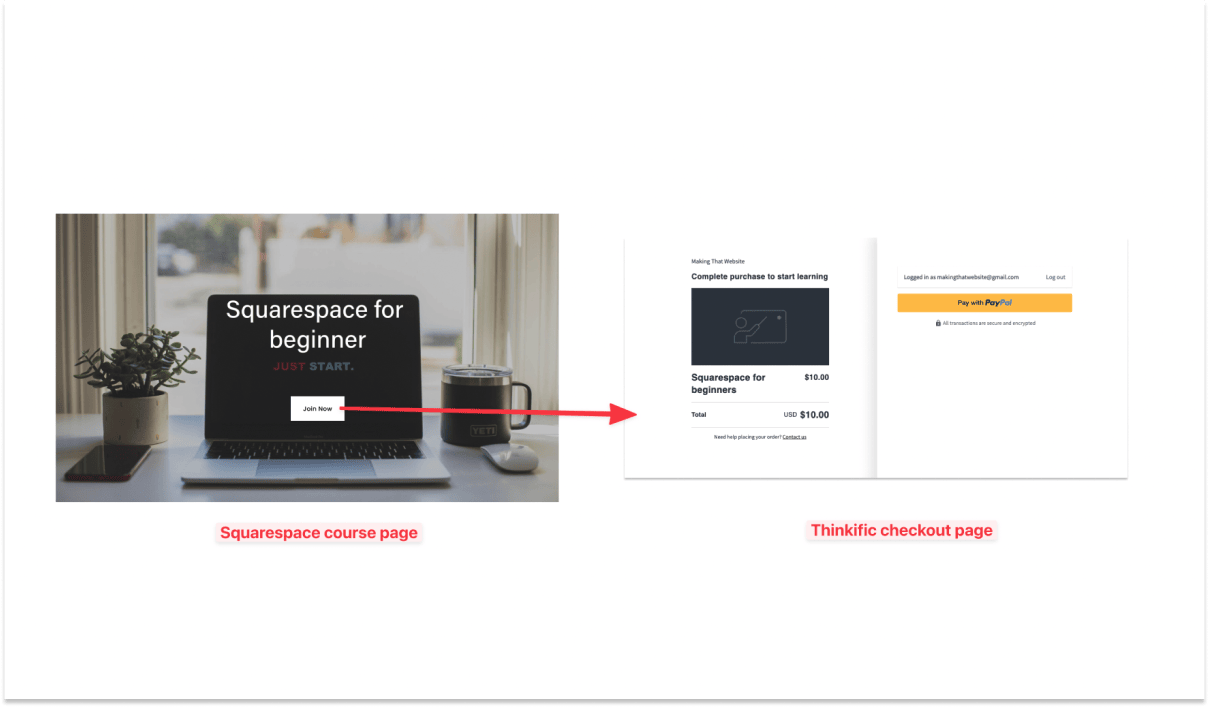
The transition from Squarespace to Thinkific is seamless, but, if you want to improve the user experience further, you can always use the same cover image for both pages so it seems like the customer never left the site.
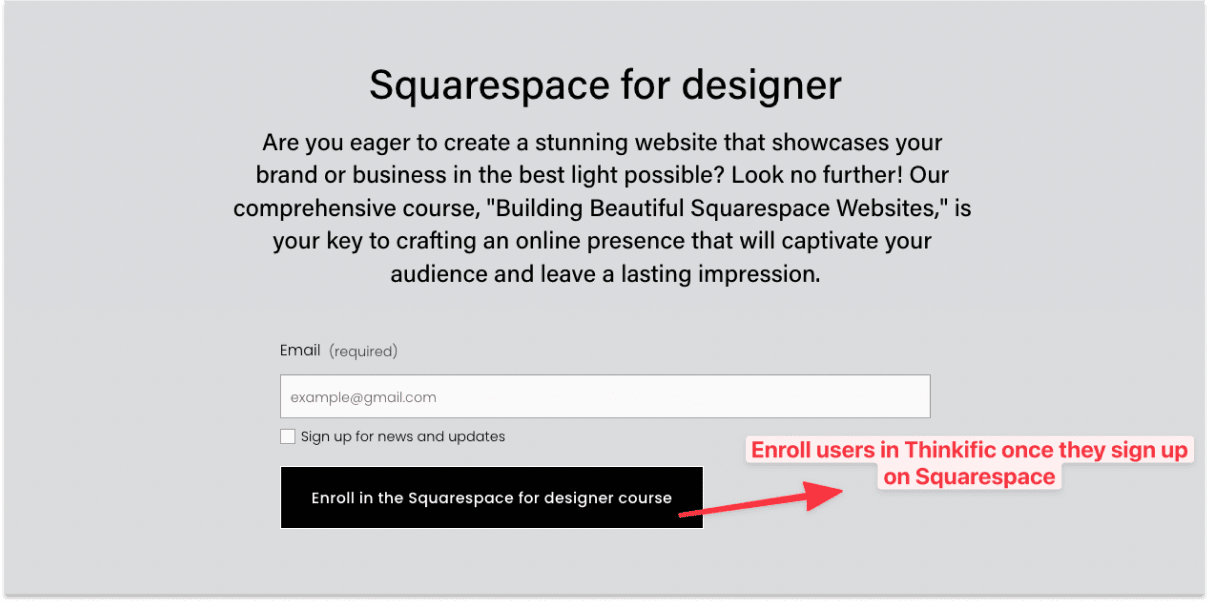
Note: You will need to set up the form on your Squarespace site before starting this tutorial.
Zapier, a third-party integration tool, enables automatic enrollment of new Thinkific members when they sign up using a Squarespace email form.
It's the smoothest integration option for Thinkific and Squarespace, but there are a few limitations to consider.
How to use Zapier to integrate Thinkific with Squarespace
1. Head over to this page on Zapier where you can enroll Thinkific users directly from Squarespace form.
2. You will need a Zapier account for this. So select either "Start with email" or "Start with Google"

3. Once in, you're required to give Zapier access to your Squarespace account. And to do that, you will need to generate an API key.
Click Sign in.

A pop-up will show, requiring you to enter the Squarespace API keys.
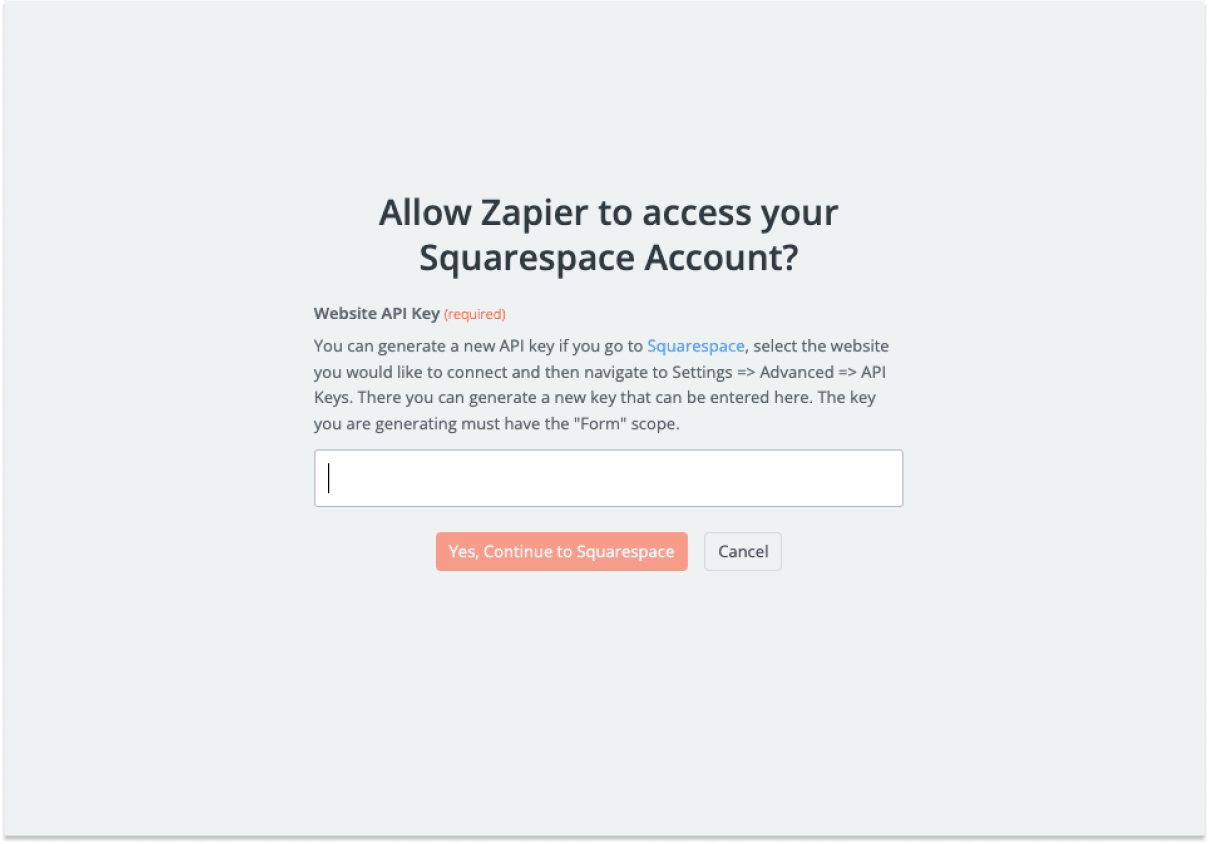
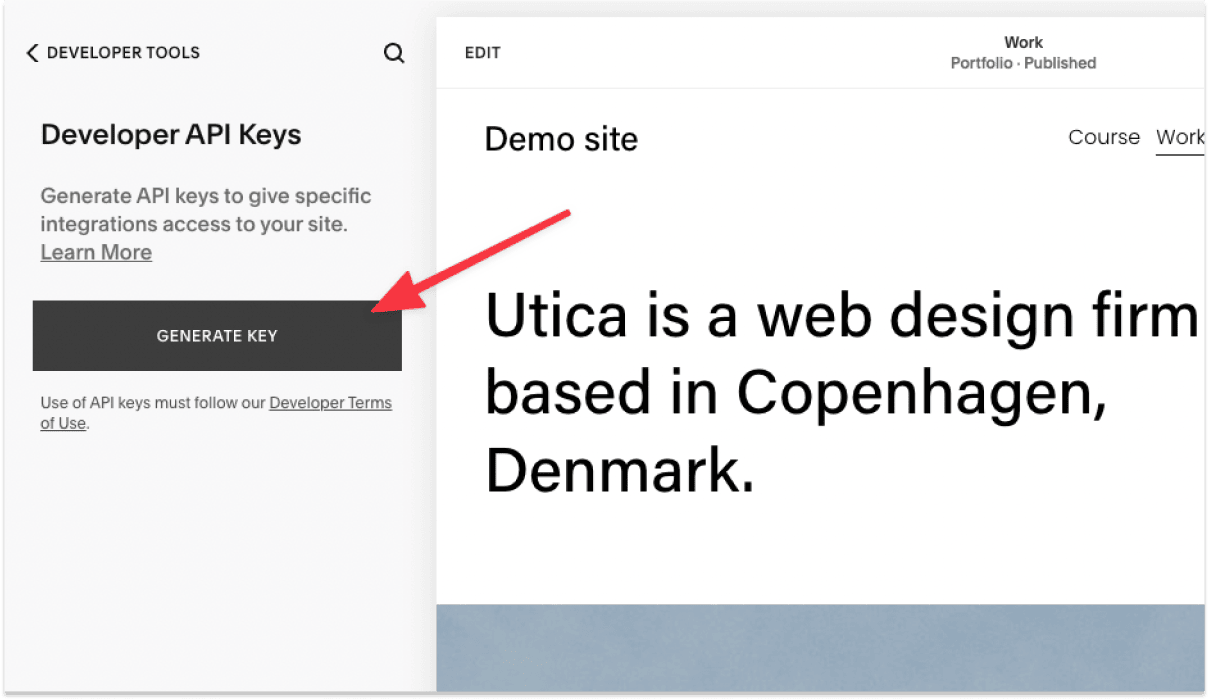
In a new window/tab, open your Squarespace site admin, head over to Settings ➝ Developer Tools ➝ Developer API Keys.
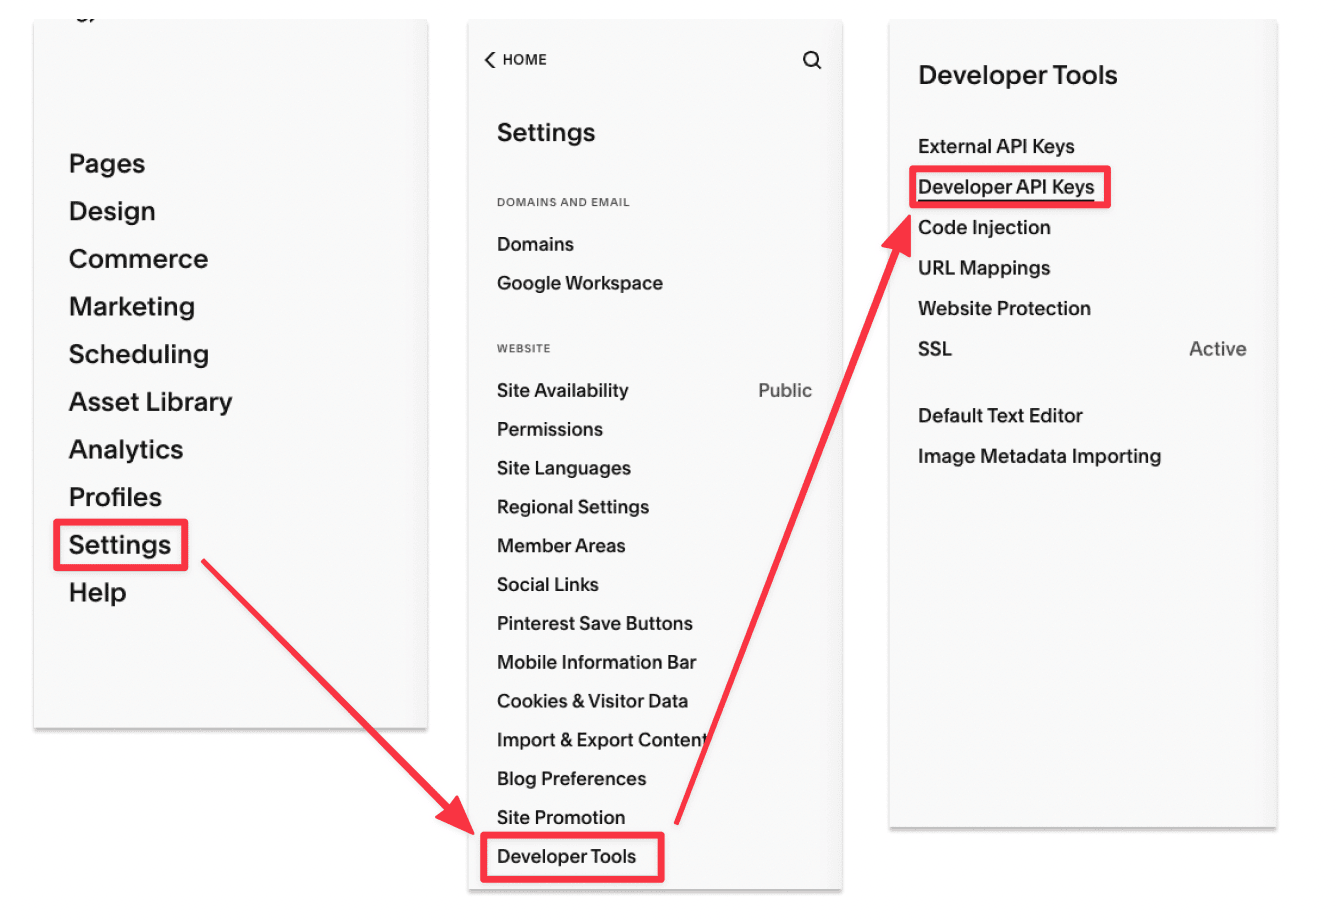
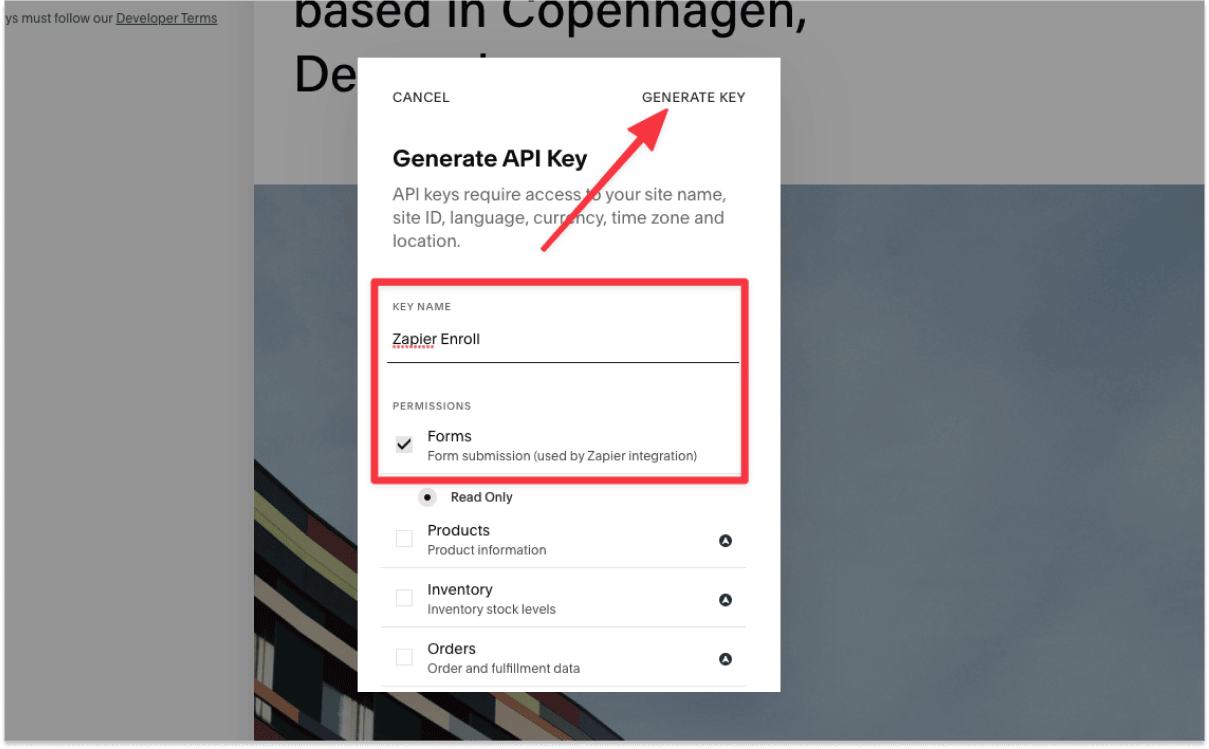
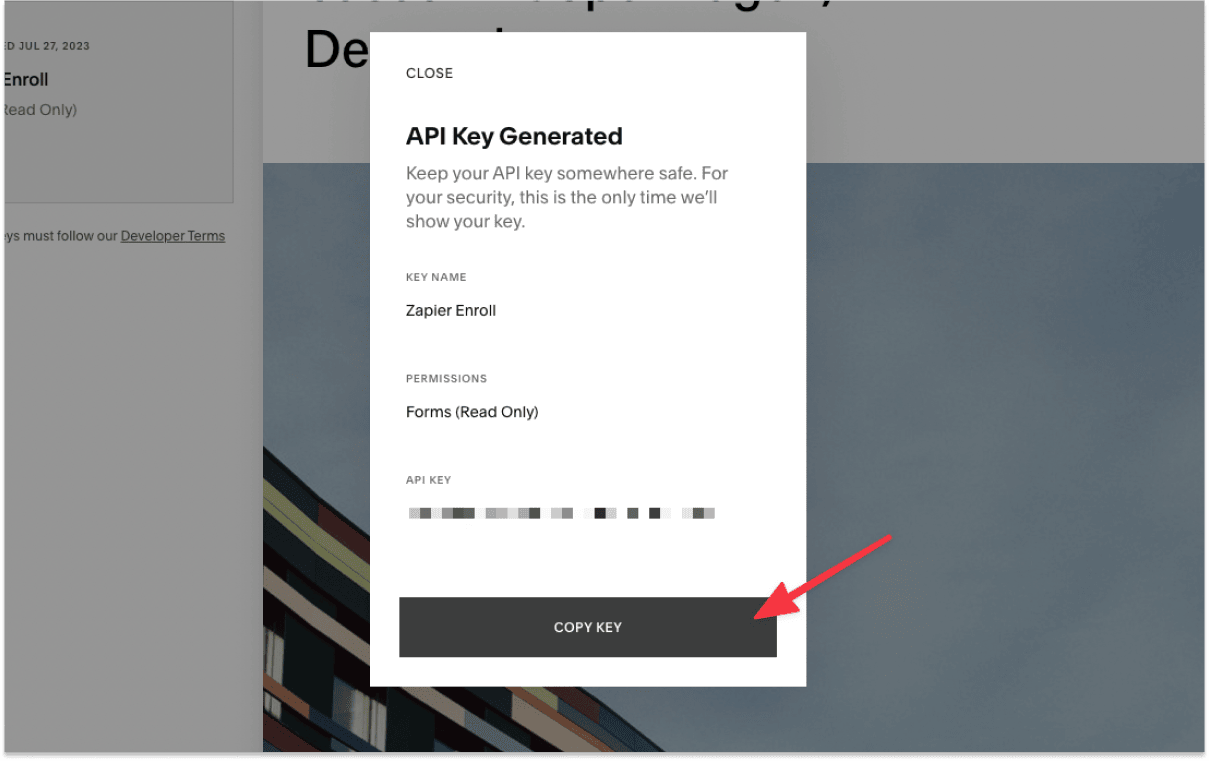
4. Select Generate Key, then enter a key name, and check the permission for Form submissions. Copy the key and paste it in the Zapier pop-up.
5. Click Continue.
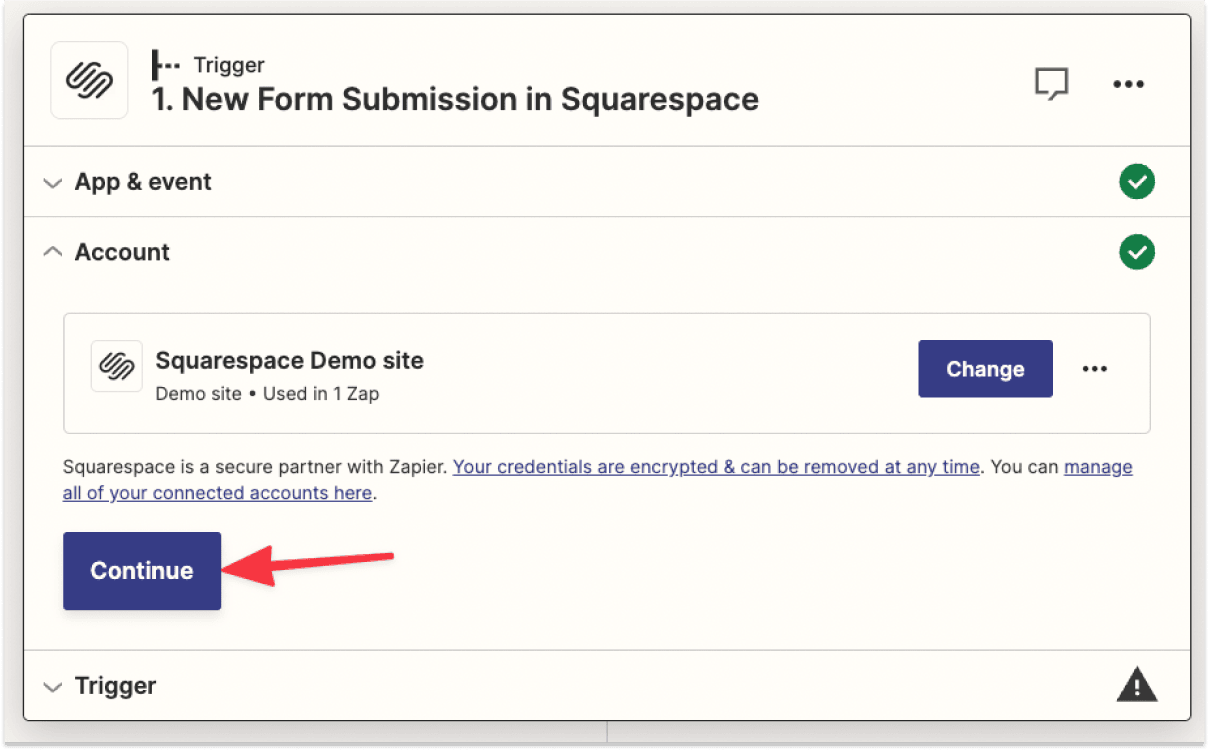
6. In the next section. You will need to select the Squarespace form that you want Zapier to enroll the users from.
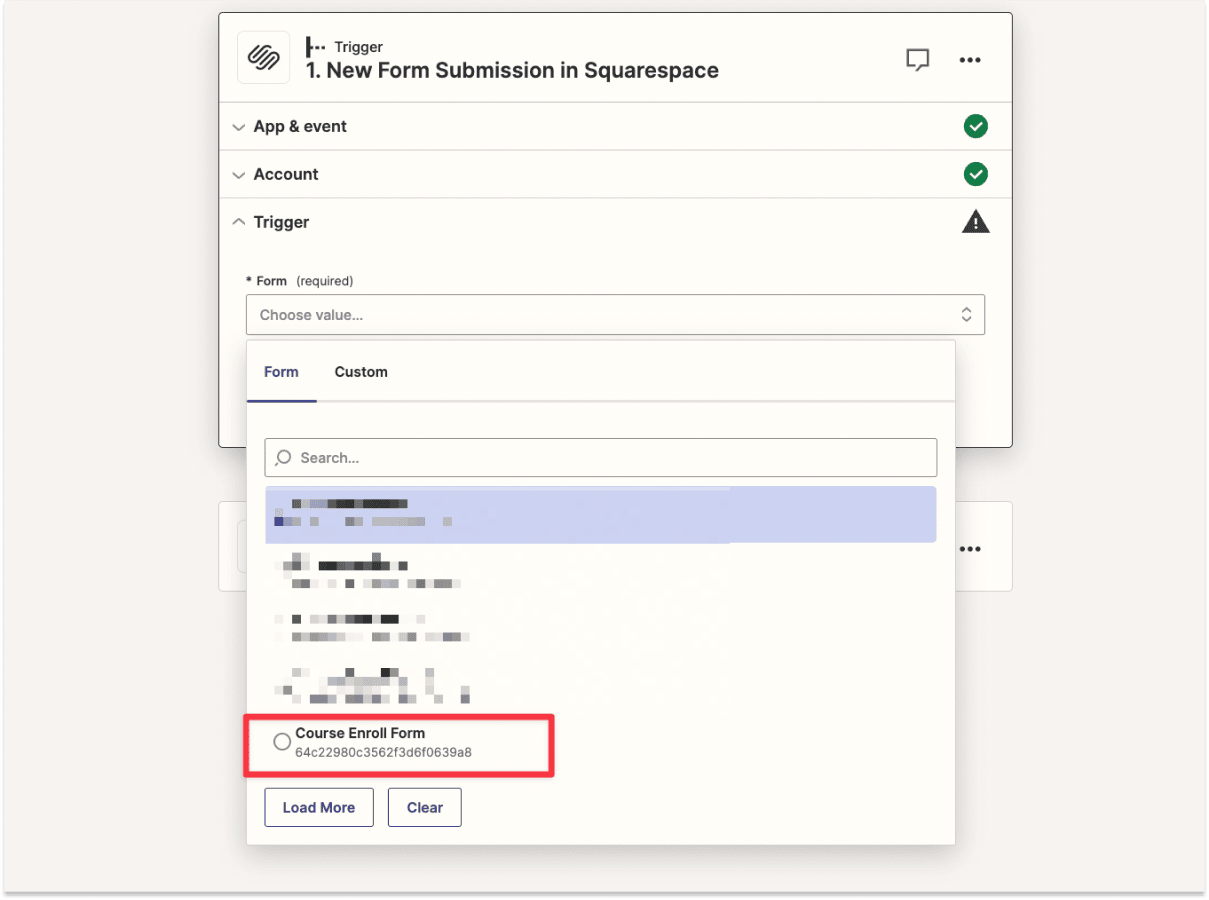
7. Click Continue again.

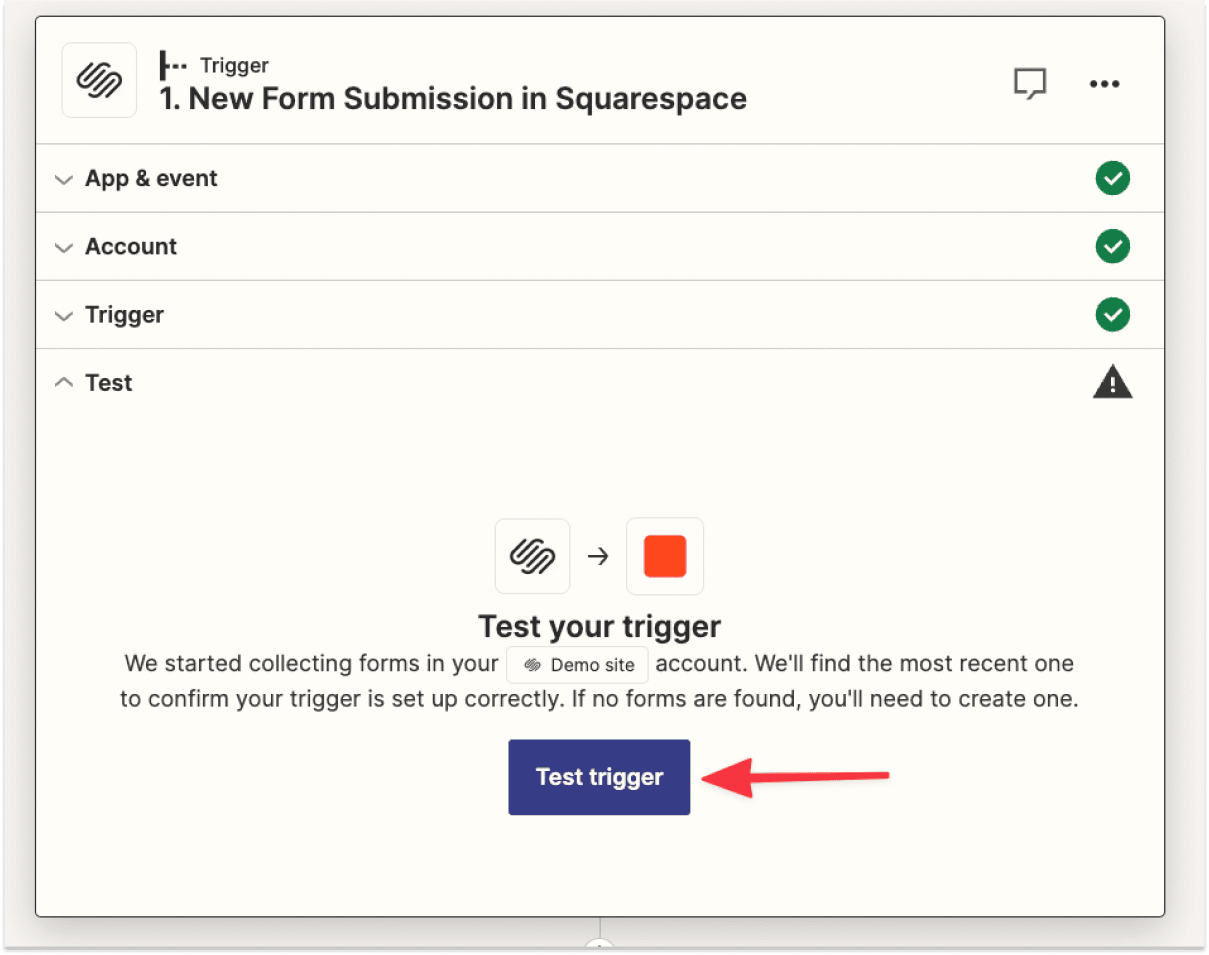
8. Next, proceed with Test Trigger. If you've set up correctly, you should the test triggers successfully.
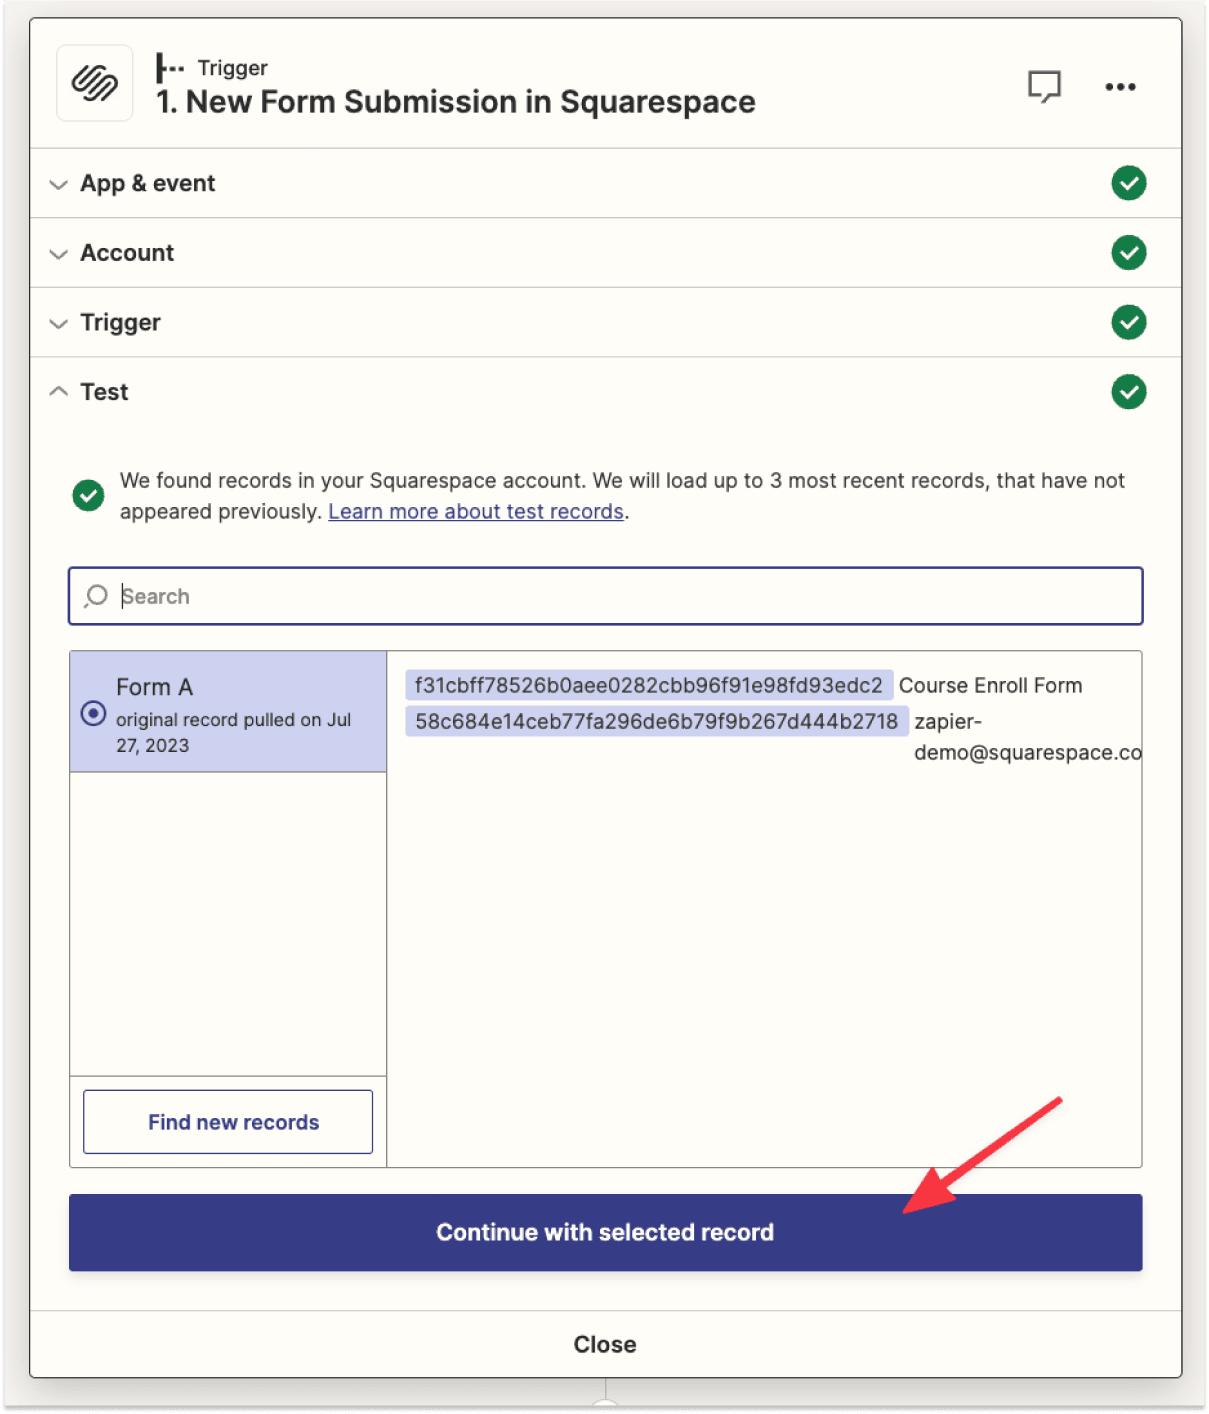
9. Continue with Selected records.
10. Next you will need to grant Zapier access to your Thinkific account. Click Sign in and the same pop-up will appear requiring you to get the Thinkific API keys.
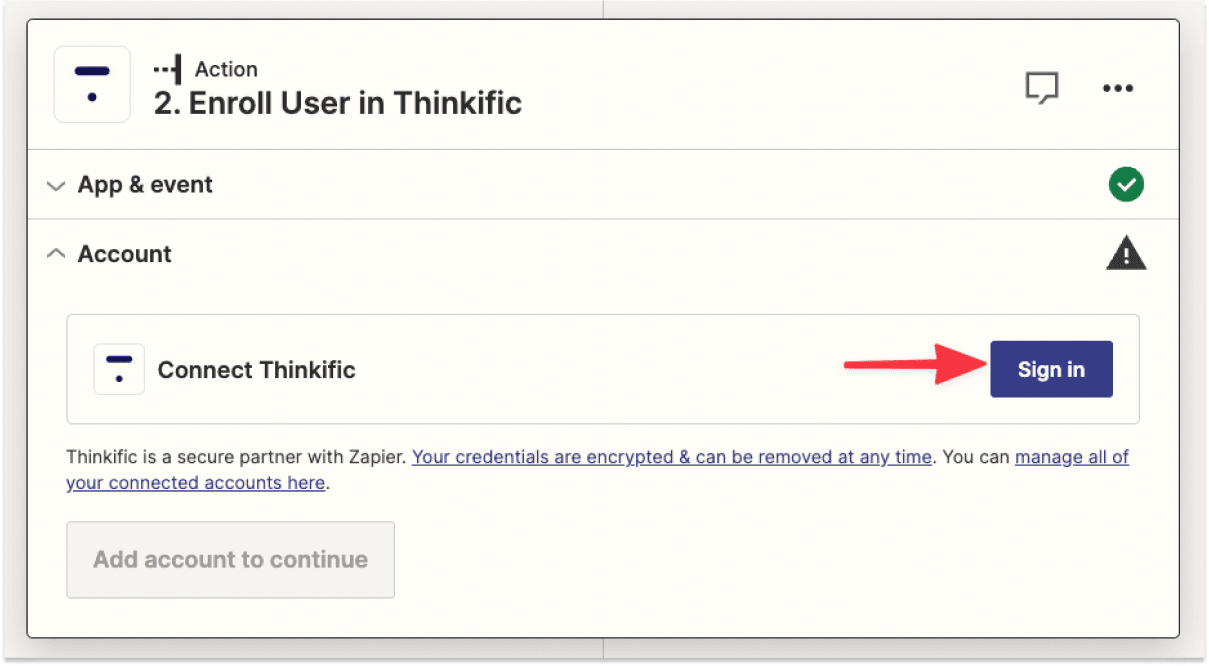
11. You can find the Thinkific API keys under Settings ➝ Code & Analytics ➝ API

12. Copy the API key and paste it into the Zapier pop-up.
13. Once everything is connected, just publish the Zap, and you're ready to go!
Lastly, make sure everything works as intended. Test signing up on your Squarespace course landing page, and you should see the new user enrolled in your Thinkif Thinkific course.
Do you want to accept payments from new course enrollees? If yes, you'll need to manually add the Thinkific course or checkout URL to your site.
Next, consider if you want to customize your course landing page. Squarespace's fluid editor offers more flexibility than Thinkific's landing page builder. For a high-converting landing page, I suggest designing it on Squarespace and then linking to the Thinkific checkout URL.
Alternatively, if you prefer a simple setup, just add a direct link to the Thinkific course page in your site's navigation.
If you wish to enroll free users to your course without hassle, the Zapier integration is ideal. It provides the most seamless experience for your customers.
Keep in mind that the Zapier integration requires the Grow plan on Thinkific, which costs $149 per month.
By default, Squarespace doesn't integrate with Thinkific. So, you'll need to manually link your Thinkific course or checkout URL to your Squarespace site.
Another option is to use a third-party tool called Zapier. This integration for Thinkific and Squarespace allows you to automatically enroll new Thinkific users whenever they sign up with their email on Squarespace.
You will need to copy the course landing page or the checkout URL from Thinkific.
Then, choose one of the following methods:
When setting up the integration on Zapier, you'll need to grant it permission to access both Squarespace and Thinkific using API keys.
Once Zapier has access, it acts as a bridge, allowing you to create automated workflows based on triggers and specific events.
For example, when someone signs up on a form on Squarespace, you can automatically enroll that user in a Thinkific course.
As of now Zapier can only enroll free users from Squarespace to Thinkific.
David Nge is the founder and writer behind MakingThatWebsite.com. Since launching in 2021, he’s been on a mission to help non-techies—especially small business owners—build better websites using easy-to-learn tools and smart, time-saving strategies. He specializes in website builders, SEO, and practical AI tutorials for small business owners.
Have a tutorial you want to learn? Leave a suggestion here.