Change the color of a link in Squarespace 7.1 (without code)
 By David Nge | Last Updated: October 04, 2024
My work is supported by affiliate commissions. Learn More
 By David Nge | Last Updated: October 04, 2024
My work is supported by affiliate commissions. Learn More
Here's a step-by-step tutorial on how to customize and change the color of a link in Squarespace without code.
Changing and styling links used to require adding custom CSS code, but Squarespace has made a number of quality-of-life changes to the platform that enable users to customize their site via their interface quickly.
In this tutorial, we'll go over:
Let's dive right in.
The setting to change the ink color is hidden within Site Styles, where you can make most of your style changes for fonts, color, spacing, etc.
There are 2 ways to get to navigate to Squarespace Site Styles, make sure you're logged into your site
From the dashboard, head to Website ➝ Styles

If you're currently editing a page, you can find the Site Styles PaintBrush icon at the top corner.

Once the Site Styles sidebar pulls up, click on the Arrow button right next to to Colors.

You will then see a list of color palettes for your current site.
Identify the template that's currently applied to this section, in this case, it's Lightest 1, then go ahead and click on the Pencil icon of the corresponding template.
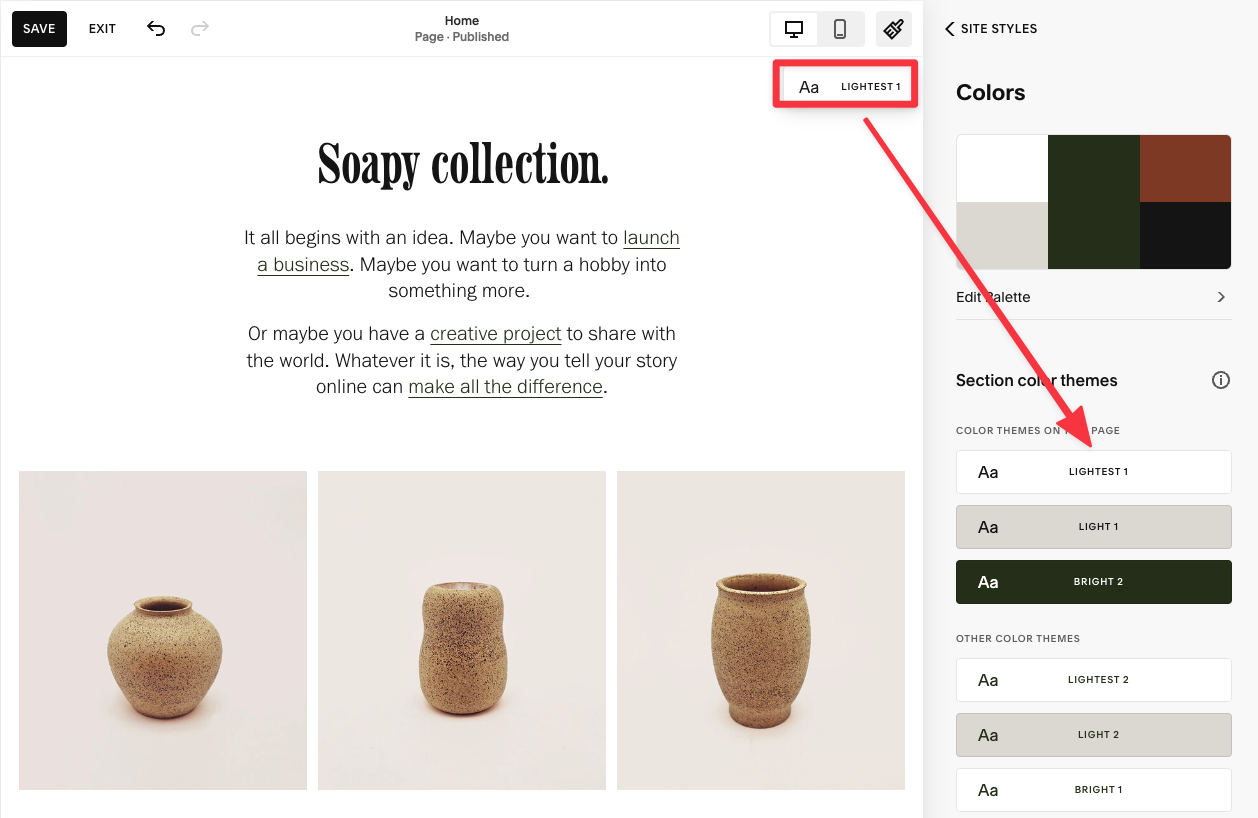
Note: The Pencil icon will only show if you hover your mouse to the palette.
Scroll down the color palette settings, and you will find a section to customize the color for LINKS.

As you can see, the current links are highlighted in dark grey, which doesn't stand out if you ask me. I'm going to change the Text Links to blue instead.
Select Text Link from the sidebar and drag the color wheel to select the color of your choice. Alternatively, you can also add the HEX Code to change the color of the link.
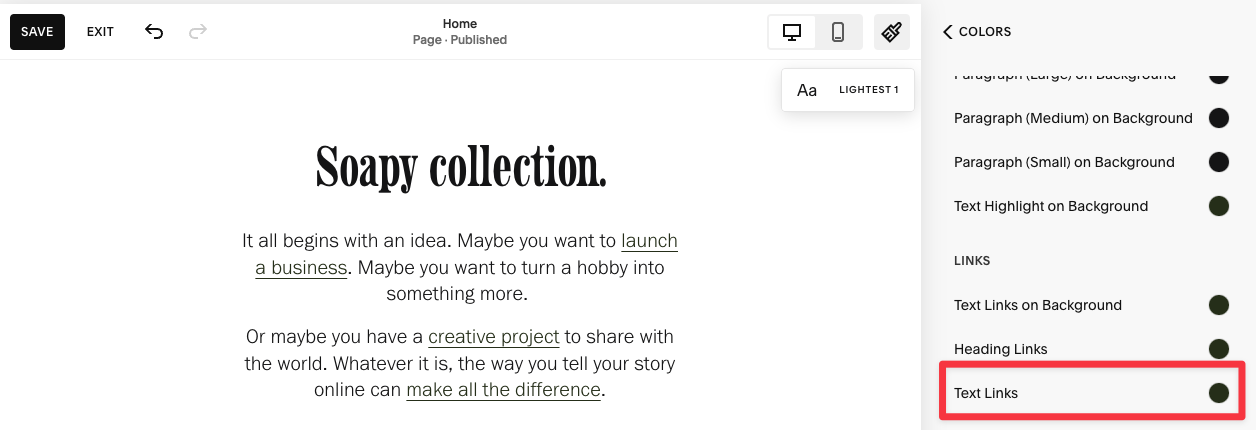

That's it! You've just changed the color of a link on your Squarespace site.
Important: When you apply a particular color for a link for the selected template, it will also change all of the link colors where the template is applied.
For example, all the links in the sections where Lightest 1 is applied will turn blue.
If you'd like different link colors for different section (for whatever reasons), you can change the template for that section and customize the link color for that template instead.
Here's how.
Hover over your page section and select Edit Section.

Head to the Colors tab and choose another template for this (i.e Lightest 1). You can now see that the background has changed to a darker color, as a result the color of the link has changed too.

To change the color for this new template, we'll follow the same process described above and head to Site Styles.

Go to Section's Colors, and choose the template we have just updated.

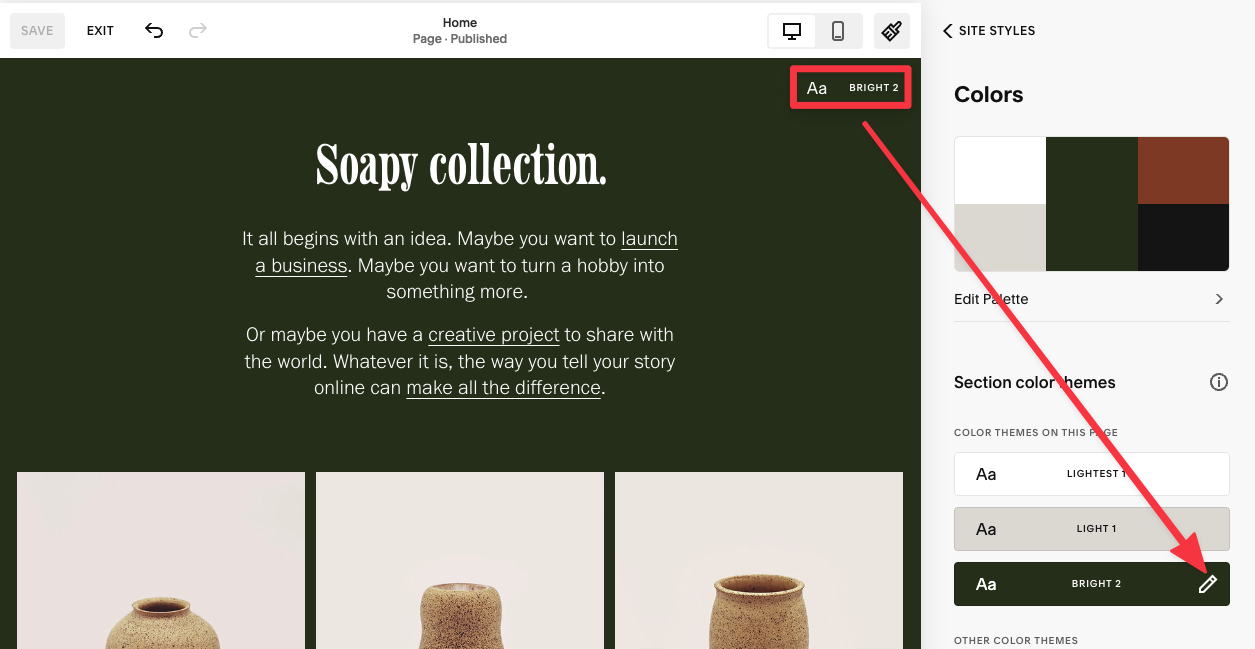
Scroll down and change the text link color once again.

Here's the updated link color.

Aside from changing the color for regular text, Squarespace has dedicated settings for you to change the color of navigation links and headings as well.
The process is the same — Identify the section those links are in, and select the color for the links.
Here I changed the color of the navigation links, which currently use the Dark 1 template for the section.

You can change the text links in the background and headings as well.

Yes, you can, but the only way to do this now is by adding custom CSS code.
While this is out of the scope of this tutorial, you can check out this Youtube video on how to add a hover effect for buttons and links.
This is also done via adding custom CSS code for your Squarespace site. You can check out this tutorial from Rebecca on how to remove underline from links in Squarespace.
Yes. You can set the link color for a particular page by applying a specific template for that page and then applying the link style and color for that template.
This process is the same as changing the link color for a specific section on your Squarespace site.