How to Sell Online Course for Free
 By David Nge | Last Updated: March 09, 2026
My work is supported by affiliate commissions. Learn More
By David Nge | Last Updated: March 09, 2026
My work is supported by affiliate commissions. Learn More
This guide will show you the best way to create and sell an online course for FREE, no credit card needed.
There's no shortage of online course platforms in the market — Teachable, Thinkific, Udemy, Podia, Learn Dash, just to name a few.
Most of them do not have a free plan.
However, a few online course platforms offer a generous free plan or let you upload courses for free, allowing you to set up a curriculum and accept payments online without needing a credit card from you.
They would take a small fee from your course sales instead (more on this later).
In summary, we'll go over:
Let's dive right in.
Let's compare some of the most popular online course platforms that allow you to sell online courses and classes for free:
Let's compare the free plan from these online course platforms and see which offers the best value:
| Payhip | Systeme.io | Gumroad | Udemy | |
|---|---|---|---|---|
| Free plan | Yes, forever | Yes, forever | Yes, forever | Yes, forever |
| Courses allowed | Unlimited | 1 | Unlimited | Unlimited |
| Students | Unlimited | Unlimited | Unlimited | Unlimited |
| Transaction fee | 5% | 0% (only Stripe/PayPal processing fees) | 10% + $0.50 per sale | Up to 63% on organic sales; 3% on instructor-driven sales |
| Custom domain | Yes | Yes (1 domain) | Limited (per product) | No |
| Custom branding | Yes | Yes | Limited | No |
| Built-in email marketing | Yes | Yes (2,000 contacts) | Yes | No |
| Sales funnels | No | Yes (3 funnels) | No | No |
| Tax handling | No | No | Yes (Merchant of Record) | Yes |
| Credit card required | No | No | No | No |
Payhip offers the most value for selling courses for free. Not only do they allow you to sell unlimited courses, you also get access to ALL the Payhip features for free, forever.
More importantly, Payhip allows you to use custom domain and include your own branding for your courses on the free plan!
The ability to custom-brand and establish credibility for your course matters, a lot, especially for a course creator for a few reasons:
All of which helps your course succeed in the long term.
Udemy is the other free option — it costs nothing to upload and sell courses. However, Udemy takes a significant revenue share (up to 63% on organic sales), and you have less control over your branding and pricing.
Note that Teachable and Thinkific have both removed their free plans. If you're looking for a truly free option, Payhip or Udemy are your best bets.
Now that we have chosen a platform, let's create a free course on Payhip.
Here are 8 steps to set up your course on Payhip before you can start selling. Feel free to skip around with the table of content below:
First, sign up (free) or login to your Payhip account
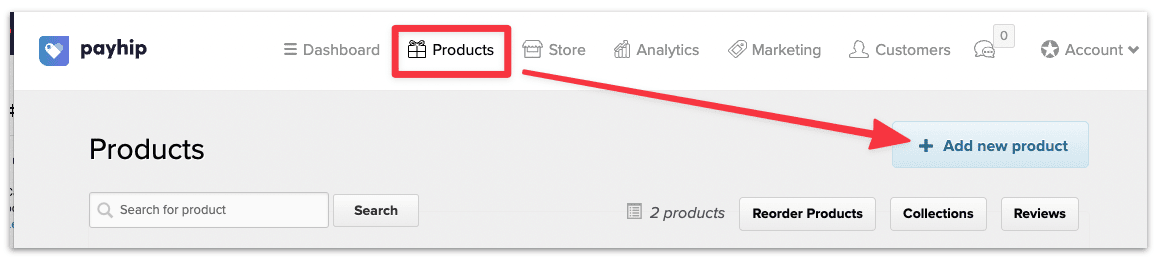
Once you're logged in, head to the Products page, and Add a new product.
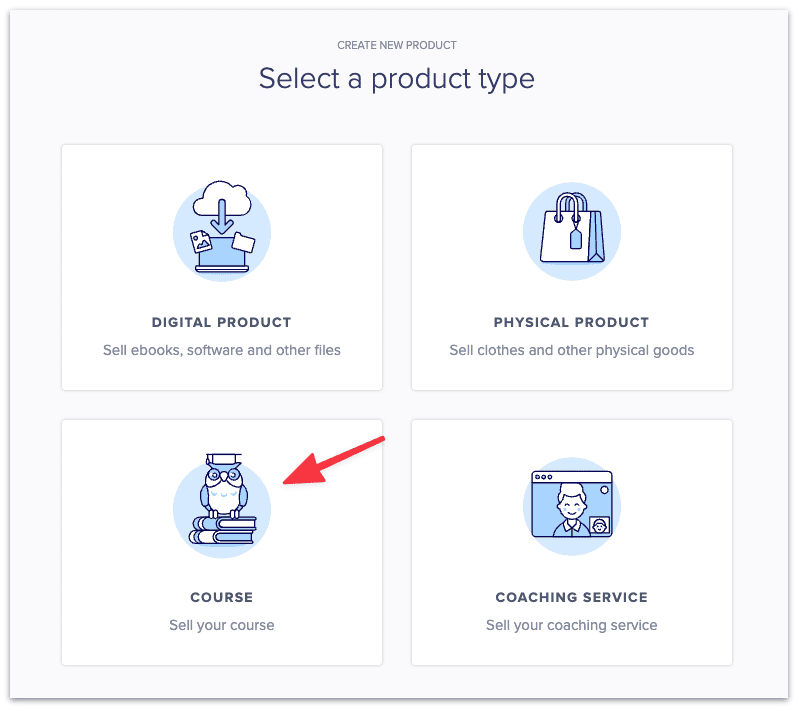
Then select Course.
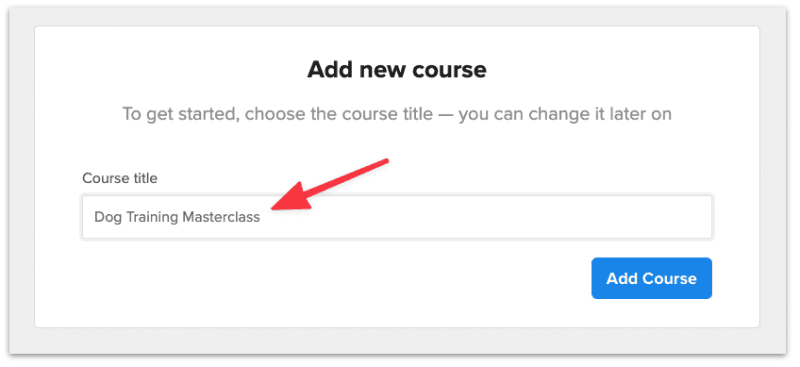
Add a course title then select Add Course.
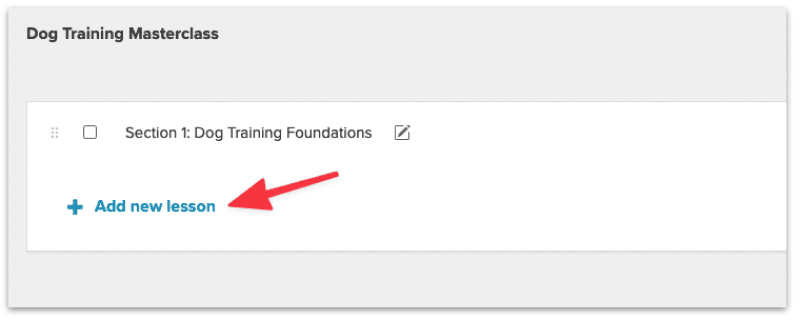
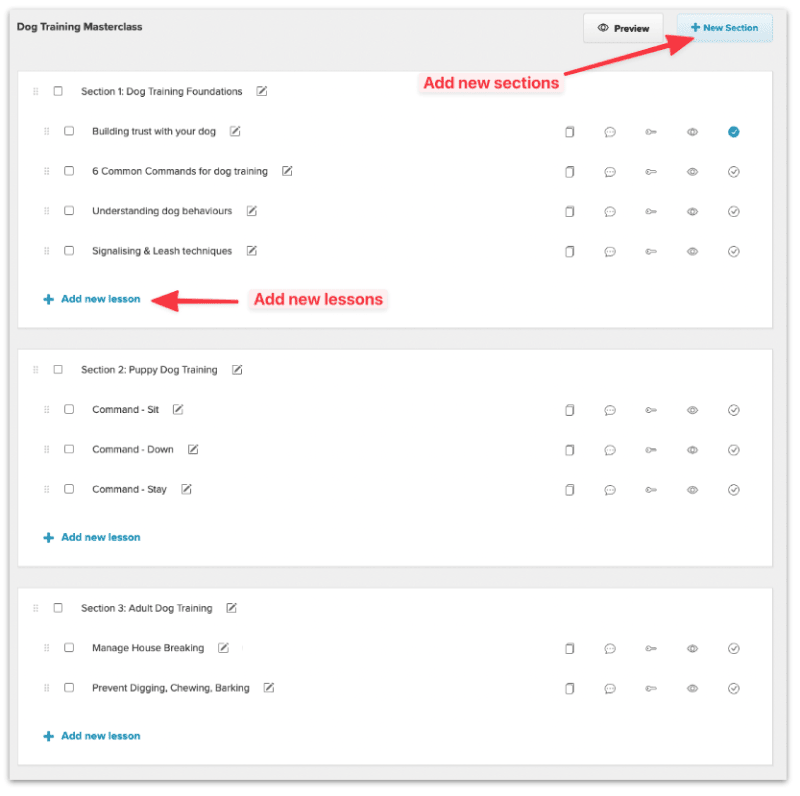
In the curriculum page, you can now build out your course structure. Your Payhip course is divided into sections and each section contains one or several lessons.
Edit your section name. You can use Section, Chapter, or Module. Whichever you find appropriate for your course.
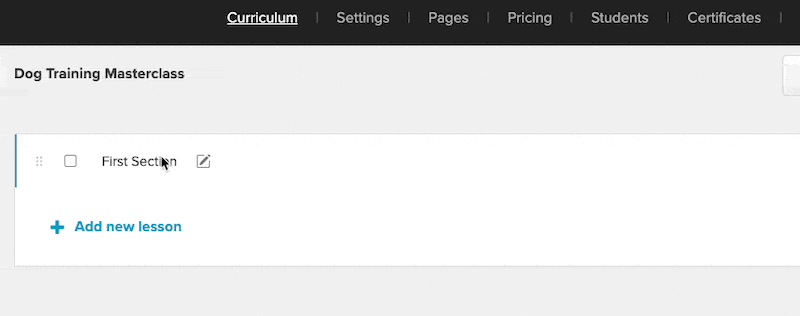
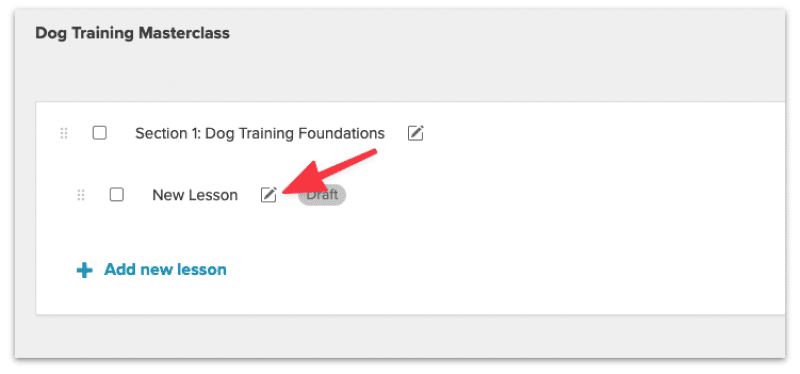
Then proceed to add your lessons.
Click into the lesson page to edit the lesson details.
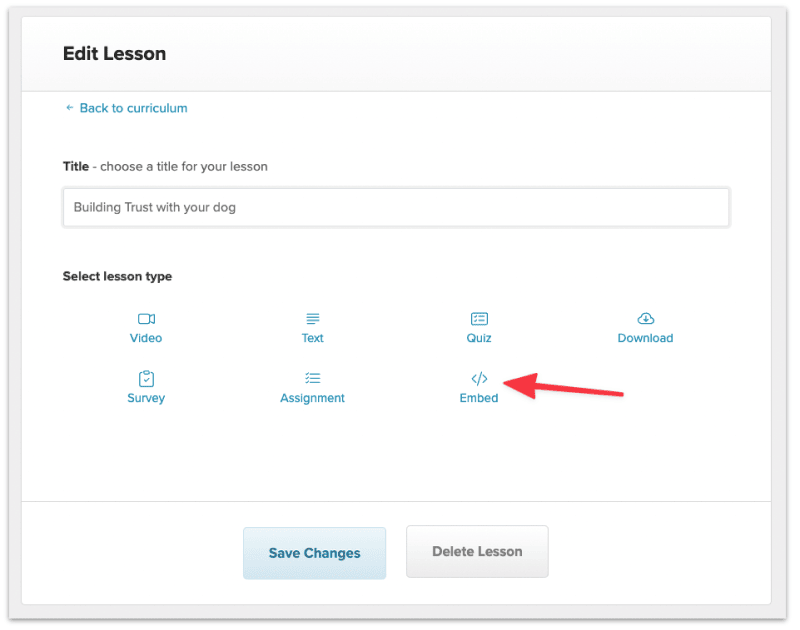
Give your lesson a title and choose the format for your lesson.
Payhip will host your videos for $5/month (up to 16 hours of video content) if you sign up for their video subscription service.
However, for the purpose setting up a course for free on Payhip , we will upload our videos on a third-party platform like Youtube or Vimeo and then embed the videos in Payhip.
Select Embed for your lesson type.
Here you'll add the video lesson and edit the settings:
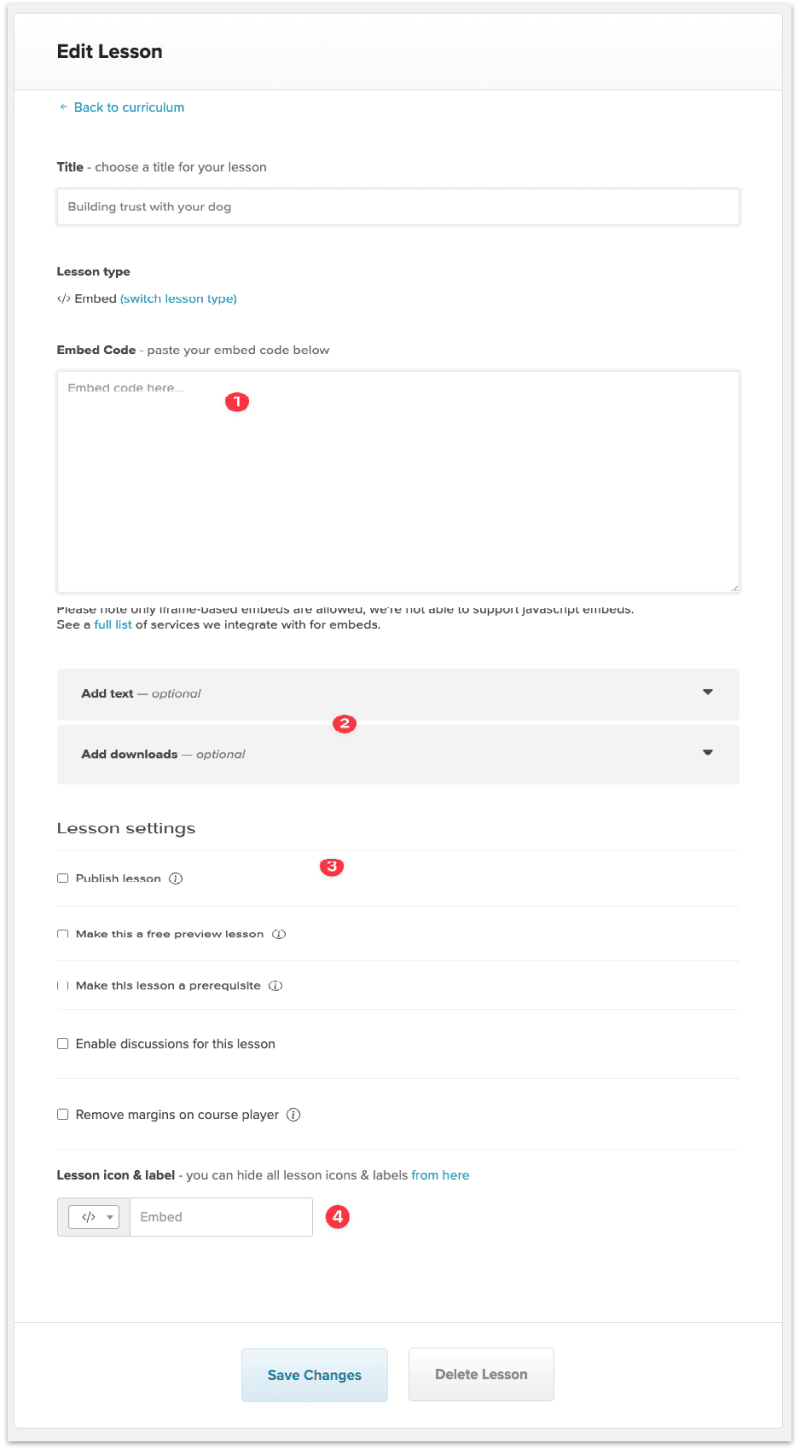
Once you're done editing the lesson, click Save Changes.
Continue to build out your course by adding new sections and lessons.
Once you're, head over to the settings page and update your course settings.
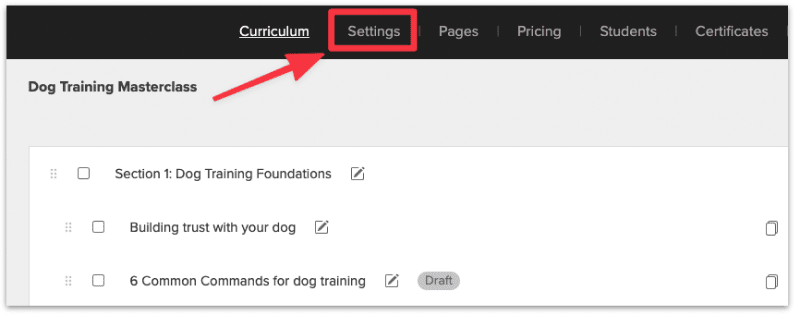
In the course settings page, update the following:
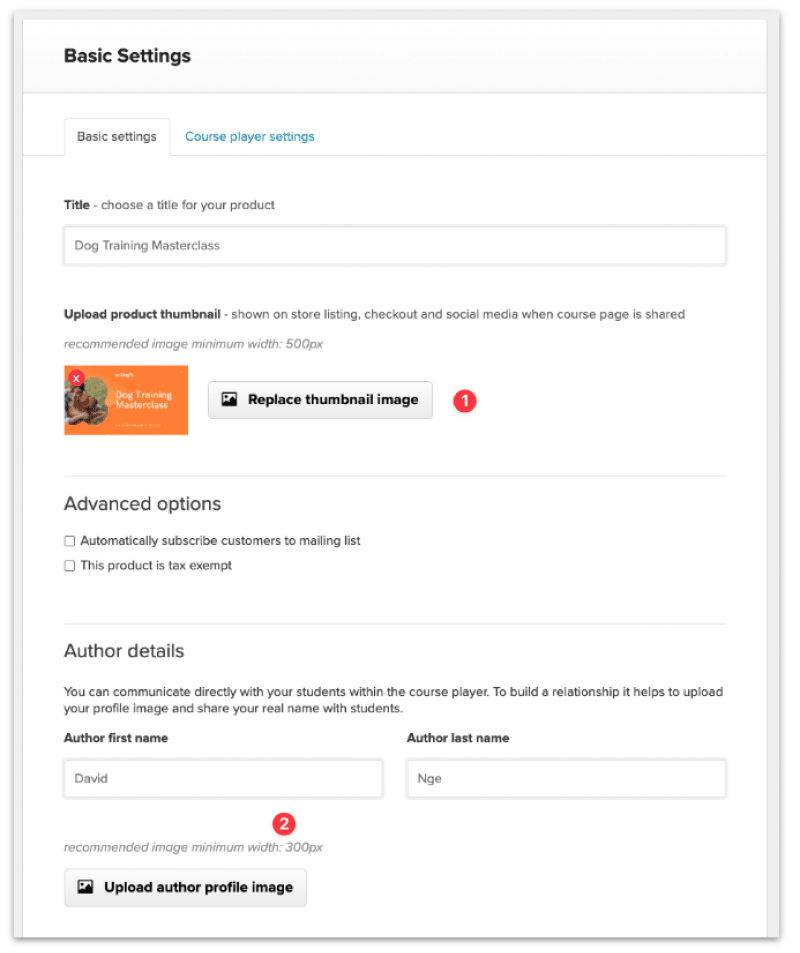
Once done, click Save Changes.
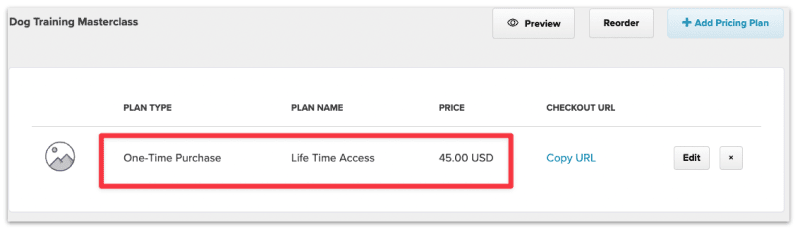
Then head over to Pricing and add a pricing plan for your course.
Head to the Pricing page and add a new pricing plan for your course.
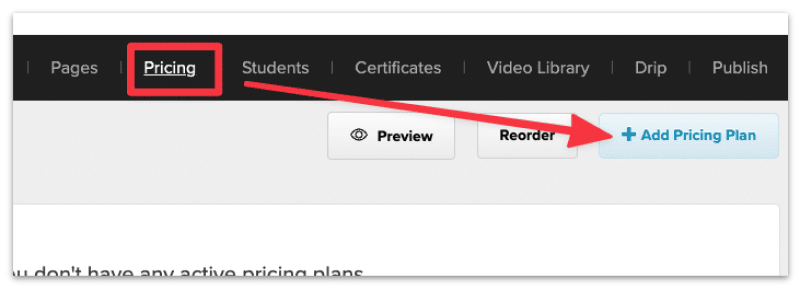
Then set a price, name your pricing plan and add the new pricing plan.

You should see the new pricing plan added to your course.
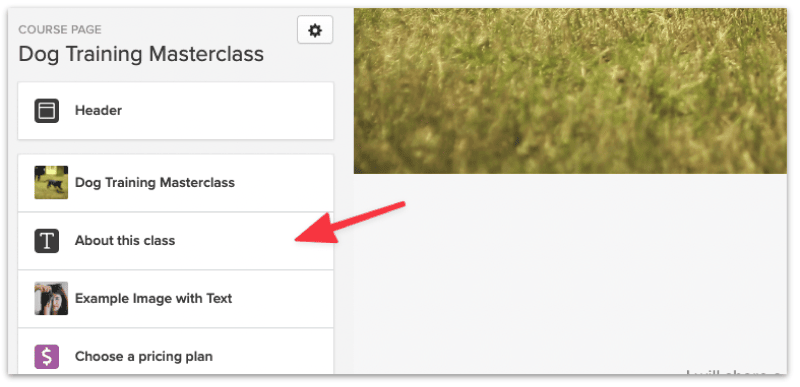
In the Pages section, edit your sales page.
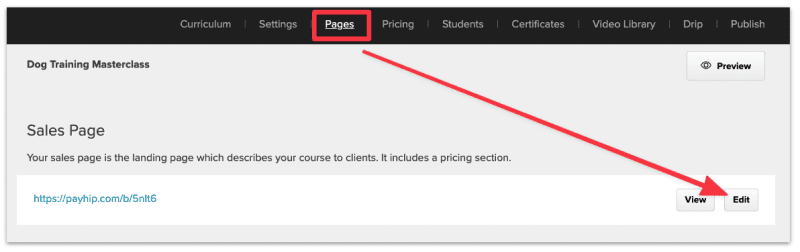
Here are the sections to customize on your sales page
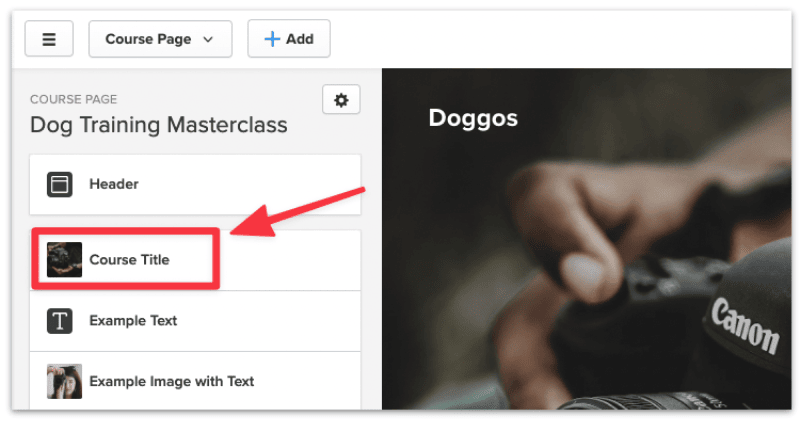
This is also what's referred to as the above-the-fold section, where your main heading, subheading, and background image sit.
Select Course Title from the sidebar to start editing your main heading section.
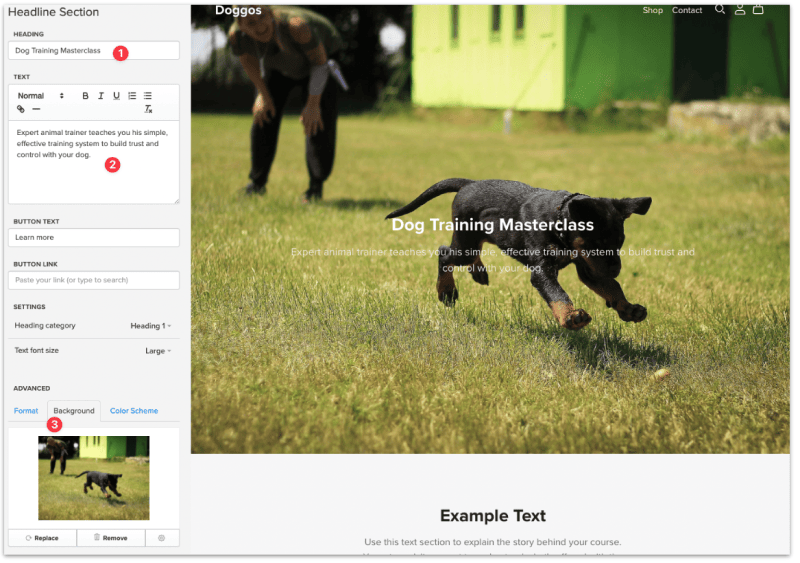
Increase the overlay opacity to reduce the brightness of the background image. This will accentuate the white text and make the headings easier to read.
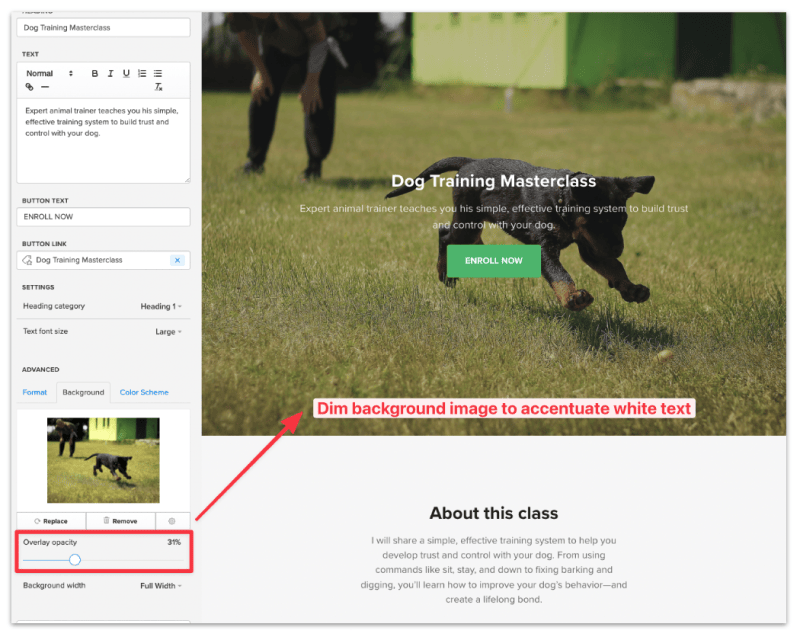
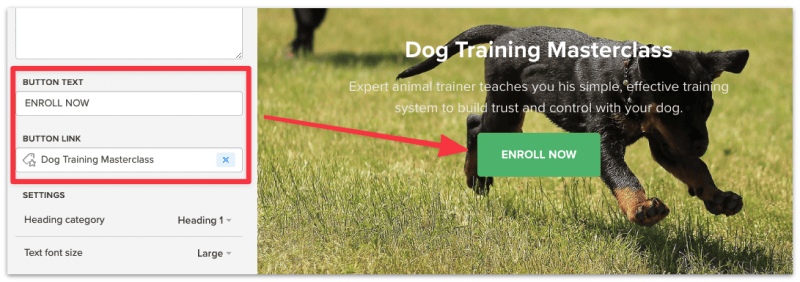
This is optional but you can add a call-to-action button, which is an effective method to drive sign up on your sales page. Make sure the button links to the course you've created.
Save changes after you're done editing.
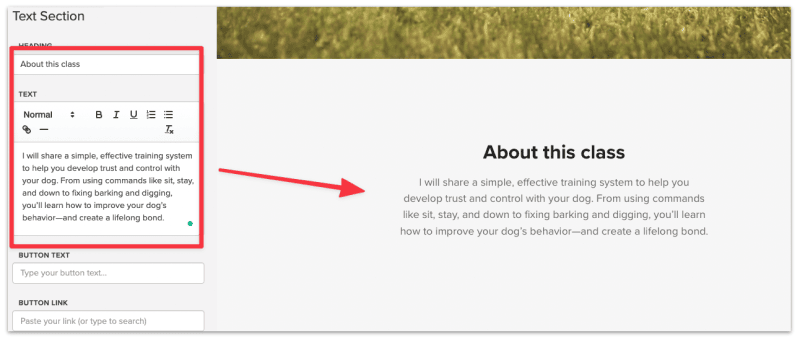
Click into the Text section and add a quick intro about your course. It's best to describe what value will you provide and the end result the customers will experience at the end of your course.
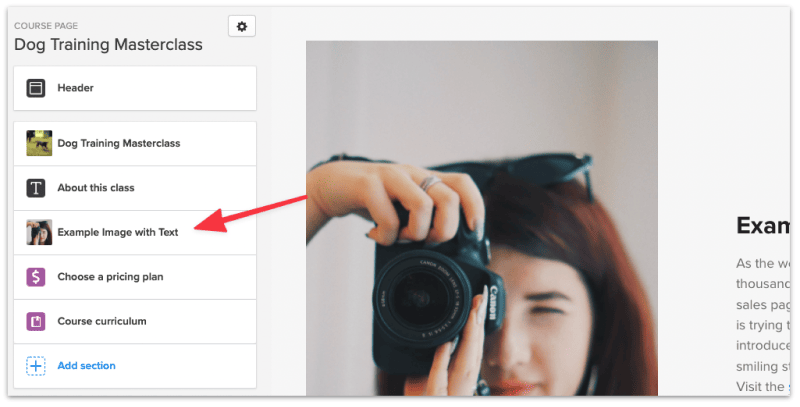
Click into the Image and Text section and update the image and description accordingly.
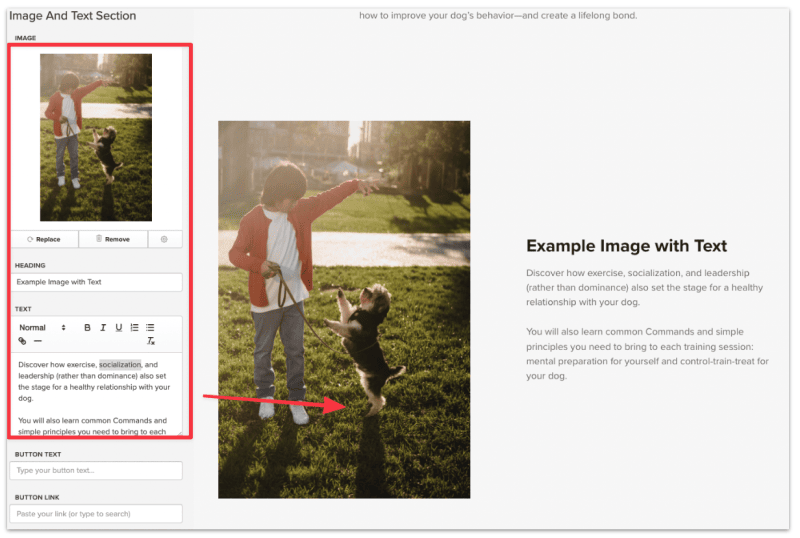
You can also add as many section as you want to illustrate your course to the audience.
Make sure to save changes after you're done.
You're almost there!
There are other things you can customize on your sales page, such as:
Once you're happy with your sales page, hit the Publish button.

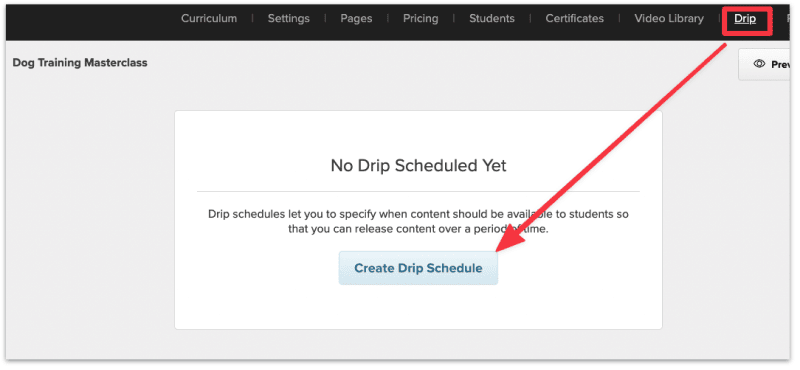
This is optional but if you'd like to set a specific time and date to access your course content, you can set up a drip schedule for your course.
Setting up a course drip schedule in Payhip lets you specify when content should be available to students so that you can release content over a period of time.
Head over to the Drip page and select Create Drip Schedule.
You can then specify when the course content should be released for each of your lesson and module.
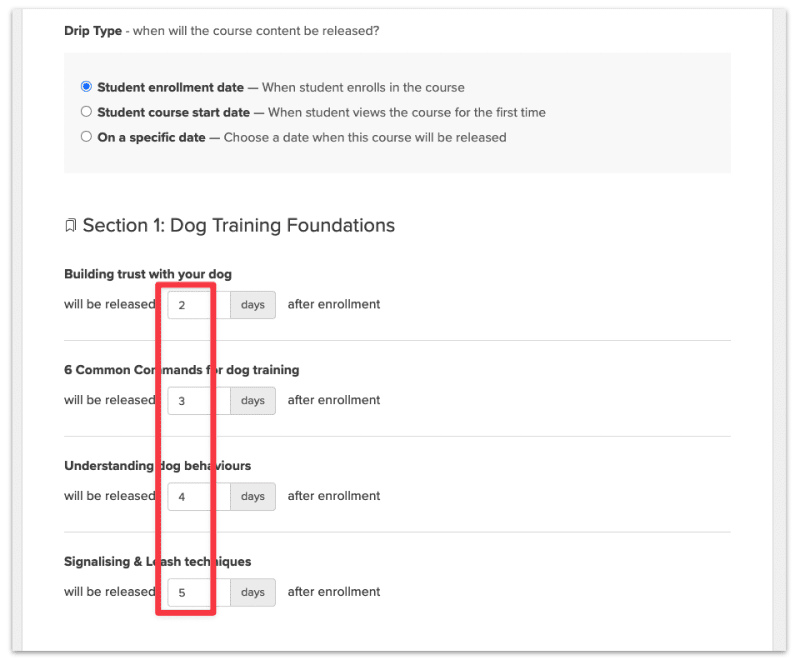
Once you're done, click Save Changes at the bottom of the page.
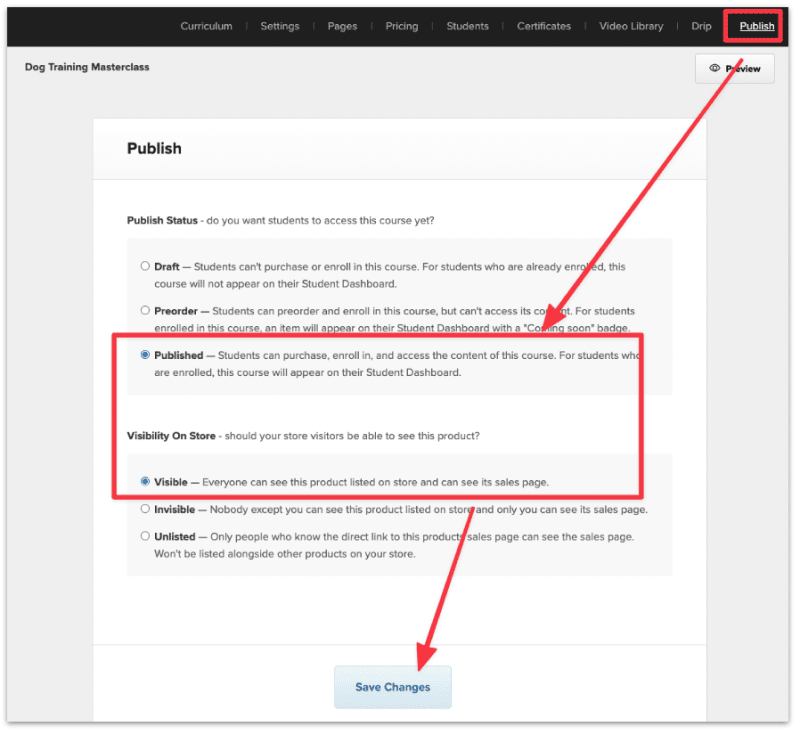
You're almost ready to sell your course!
Head over to the Publish page, change the publish status and the visibility of your course, and hit Save Changes.
The last thing to do before you can officially start selling is to set up a payment account on Payhip.
Payhip supports multiple payment processors including Stripe, PayPal, Square, Mollie, Mercado Pago, Paystack, RazorPay, and more — so when a customer buys from your Payhip store, the payment is instantly transferred to your connected account.
Here's how to set up PayPal on your Payhip account.
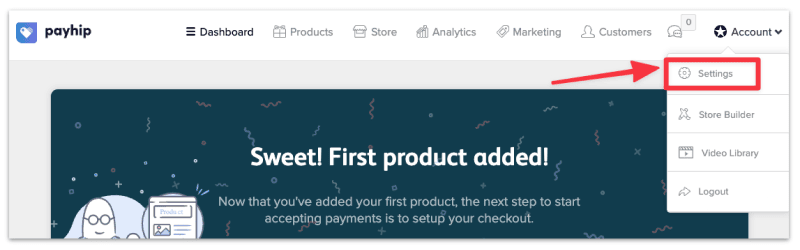
In your Payhip dashboard, click on Account from the top right corner and select Settings.
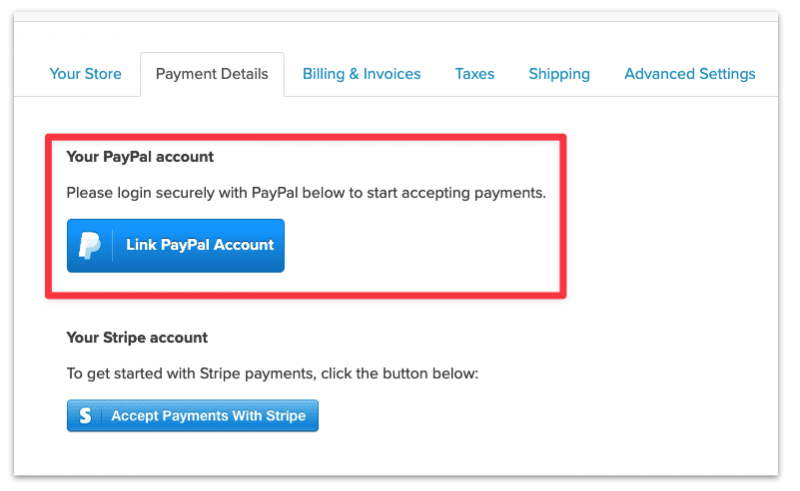
Head over to Payment Details and you'll see the options to connect to your PayPal or Stripe account (along with other supported processors).
Select Paypal and enter your Paypal email address.
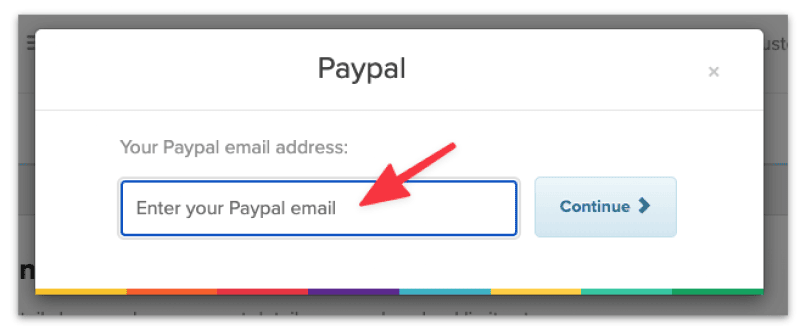
Confirm to connect your Paypal account to Payhip. You will then be asked to log in to your Paypal account.
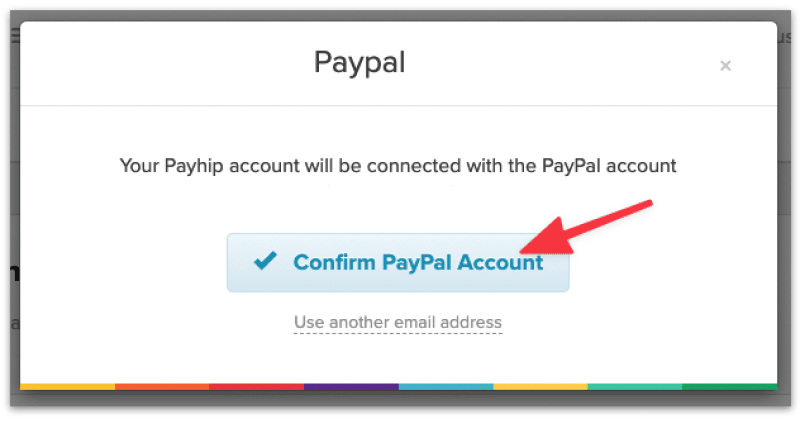
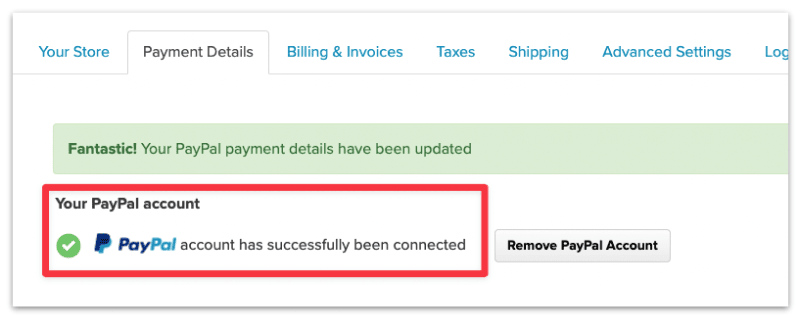
Once you've successfully logged in, you'll be redirected back to your Payhip account, and you'll see the confirmation message that your Paypal account has been connected.
You're now ready to sell your course and make some money! To retrieve your sales page URL, head over to the Products page and click on Share.
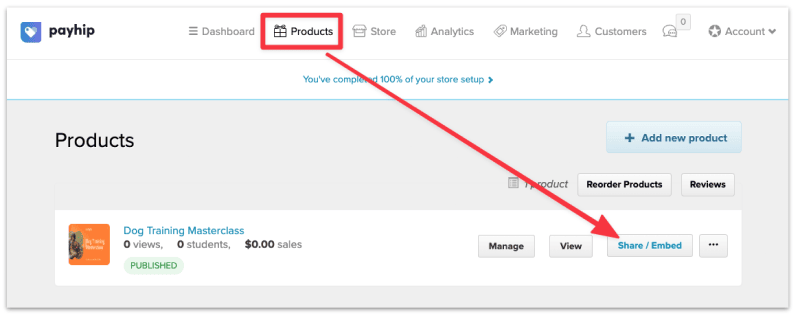
Copy and share the sales page URL to start selling.
That's it!
Payhip has made it easy to set up and sell online courses for beginners. If you have all your course assets ready, you can probably set it up in an hour or two.
Here are some additional resources to help you in your selling journey:
Yes, Payhip was founded by Abs Farah and Kahin Farah in London, UK, back in 2011 when they couldn't find an easy way to sell digital products, courses, and memberships online.
They're registered in the UK (Reg No. 08386910), and their office is located at 167-169 Great Portland Street, 5th Floor, London, W1W 5PF.
You can learn more about the company here.
Yes, Payhip offers a Free-Forever plan that allows you to use all its features to sell unlimited products with no revenue cap. You can get started with Payhip without a credit card.
There are five categories of products you can sell on Payhip:
Payhip takes 0-5% transaction fee depending on which Payhip plan you're on.
David Nge is the founder and writer behind MakingThatWebsite.com. Since launching in 2021, he’s been on a mission to help non-techies—especially small business owners—build better websites using easy-to-learn tools and smart, time-saving strategies. He specializes in website builders, SEO, and practical AI tutorials for small business owners.
Have a tutorial you want to learn? Leave a suggestion here.