4 ways customize Weebly header
 By David Nge | Last Updated: September 25, 2024
My work is supported by affiliate commissions. Learn More
By David Nge | Last Updated: September 25, 2024
My work is supported by affiliate commissions. Learn More
Here's a step-by-step tutorial on how to customize the header on your Weebly site
There are several ways to customize the header.
In summary, we'll go over:
By the end of this tutorial, you will be able to successfully edit and customize your Weebly header one way or the other.
Let's get into it.
Before you start, it's assumed that you've login to your Weebly account and have chosen a site to edit.
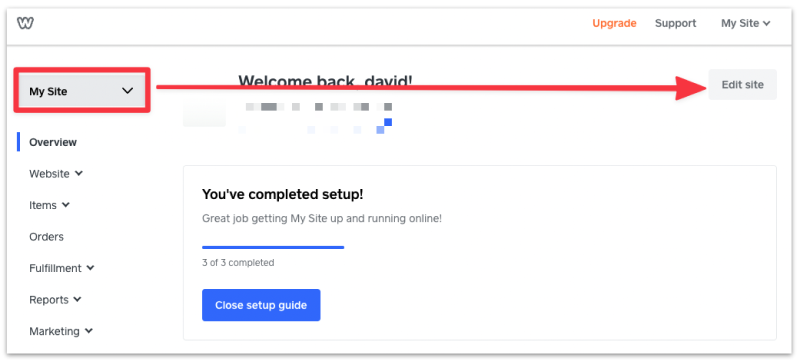
In the main editor, hover your mouse over the title area. You will see a floating menu with 3 options:
To change the header title to a logo, select the logo option. You'll see a pop up requiring you to upload an image from your computer.
Select your logo and the header title will automatically be updated.
Alternatively you can hide the logo or change it back to a title text instead.
Note: Weebly doesn't allow you the add both a logo and a title by default.
Navigation is a crucial part of the header.
At the most basic, you can add new pages and sub pages with a drop down menu to your Weebly site's navigation.
You can also change the header background color, customize the navigation font size, color, spacing between the navigation links, and more.
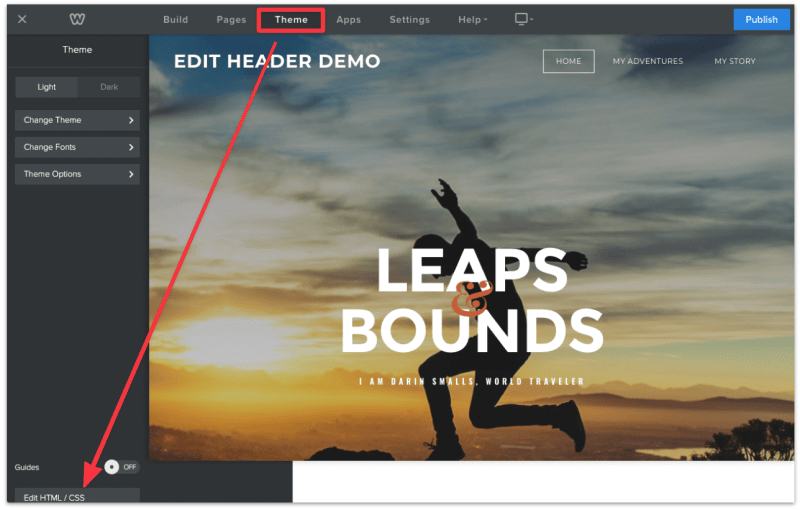
First, head to the code editor by clicking Theme ➞ Edit HTML/CSS.
Before we can customize the navigation, we need to find the specific code that belongs to the it.
Here's how to do that in your browser.
Right click on one of the navigation links and select Inspect. You will see a new panel in your browser with the HTML code.
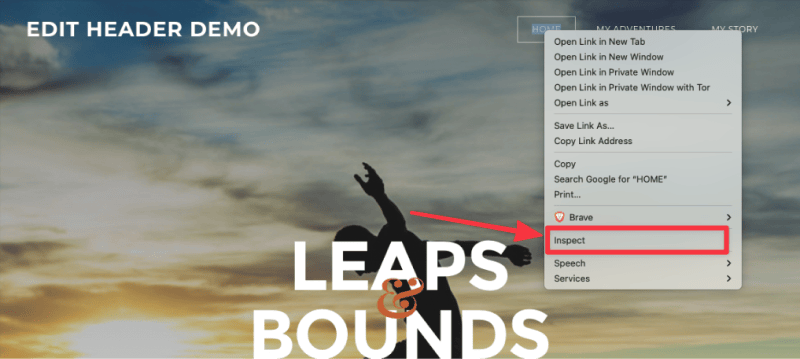
If you look closely, the navigation link that you right click is highlighted in the HTML code.
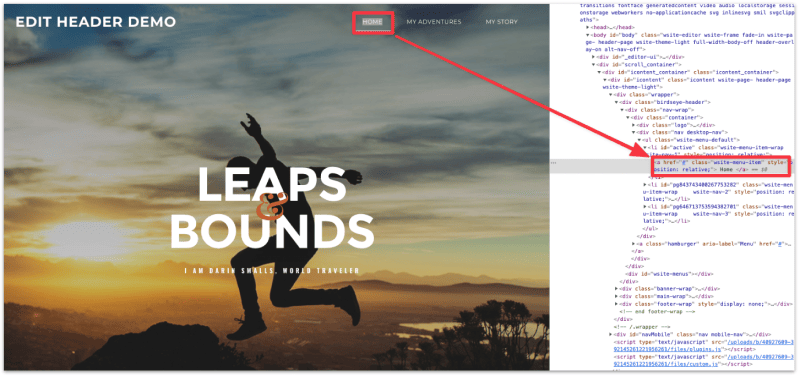
Look for the class keyword in the highlighted code and copy the name of the class.

In this example, the name of the class is:
wsite-menu-itemNow back in the Weebly text editor, select the _nav.less file (if you don't see this, then select the main.less file) and search for the class name.
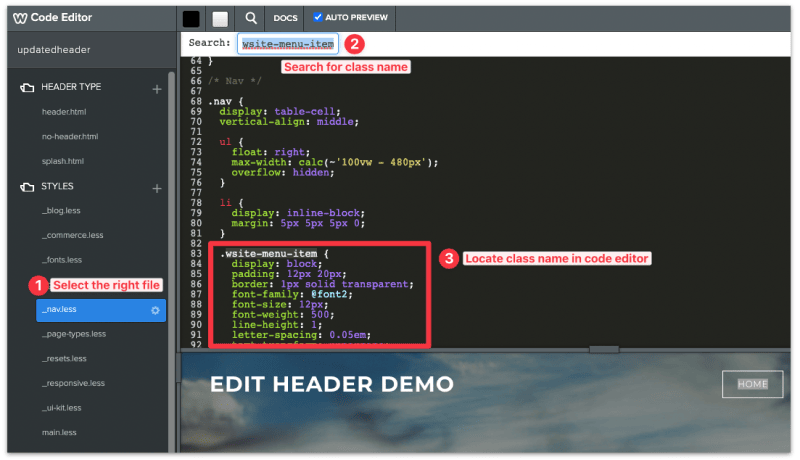
You should now see the code section that customizes the navigation.
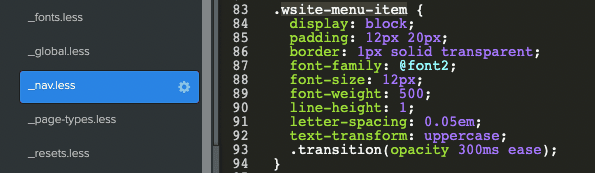
While teaching HTML/CSS is out of scope for this article (here's a great resource instead), you can customize a few things that are fairly easy:
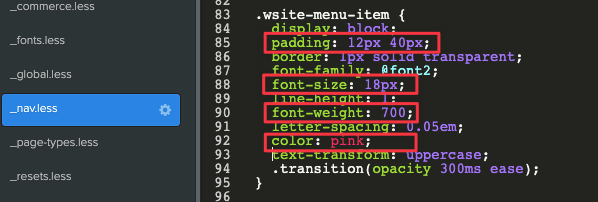
You can even change the custom font (font-family) in the header! Just make sure you've added a new custom font in Weebly prior.
Making the right aesthetic changes may take a couple tries but understanding the basics of HTML and CSS will get you further along in the future.
Once you're satisfied with the changes, hit Save and Publish.
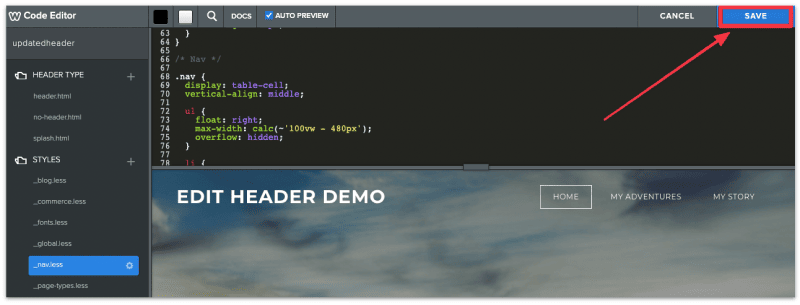
You've just customized the outlook for the navigation, sweet.

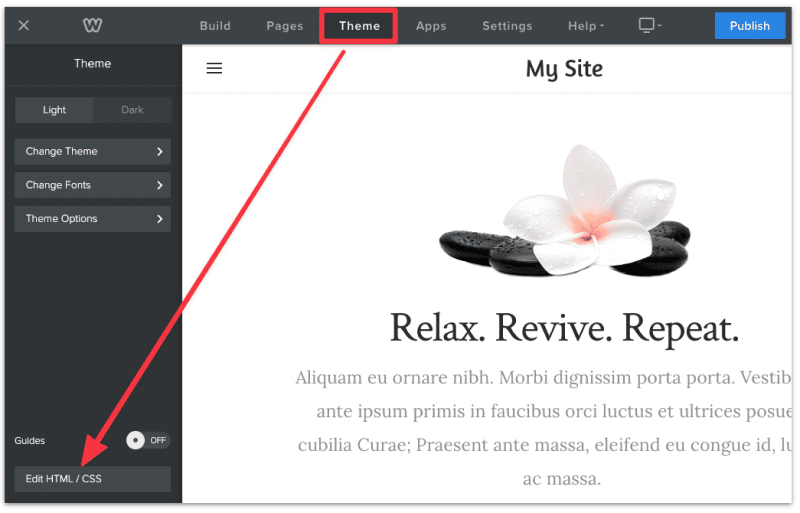
First, head to your website Theme and select Edit HTML/CSS.
Important: Make a note whether your website is currently using the light or dark theme, this will affect how you update your header.
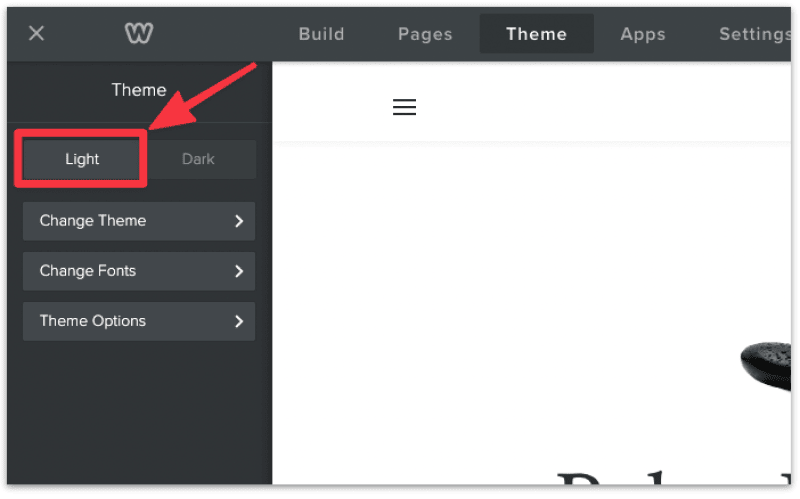
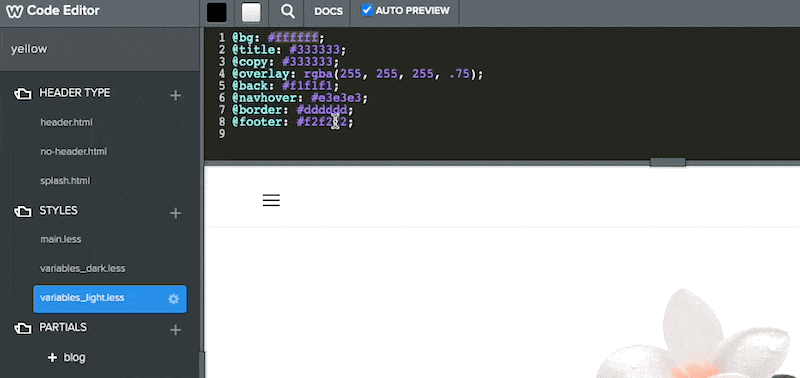
If your website is using a light theme, then click the variables_light.less file on the sidebar. If your site is using a dark theme instead, then click on variables_dark.less.
Since the website in this demo is using a light theme, we'll select the variables_light.less file.
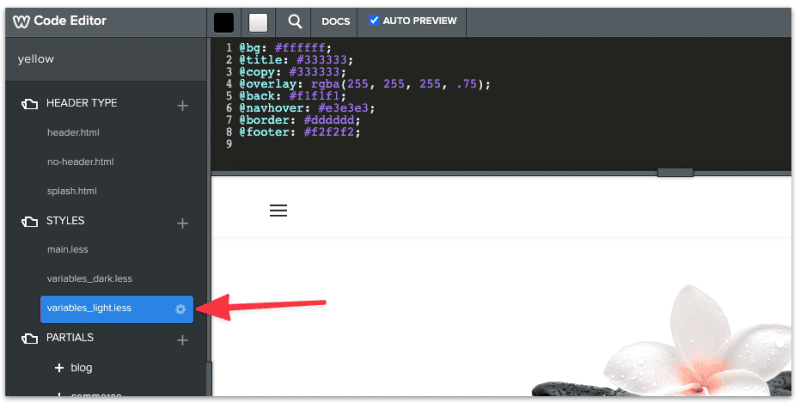
Next is to update the color code for for the header.
Look for the first line in the code editor which should consist @bg followed by a 6-digit color code.
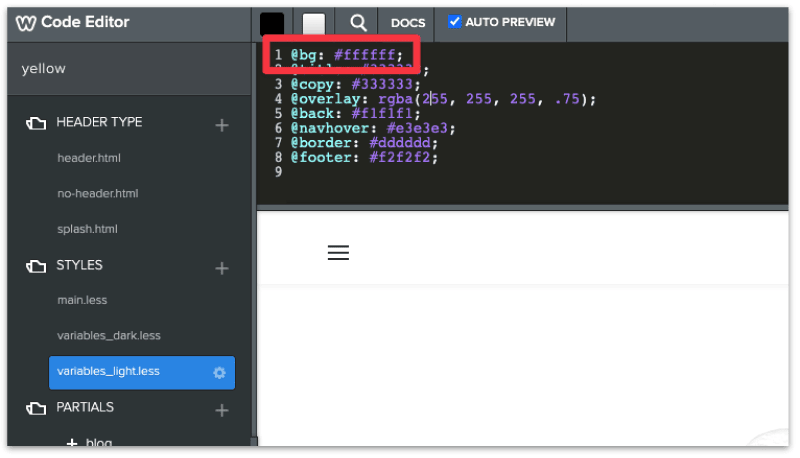
The existing color code is #ffffff which is white. You can change it to whichever color you like.
If you have no idea which color to choose then just use #fffa00 (yellow) for practice. Alternatively, head to this color picker website to identify the closest color to your preference.
The Weebly code editor will show a preview of the color change on your header. Be sure to click SAVE to update the changes.
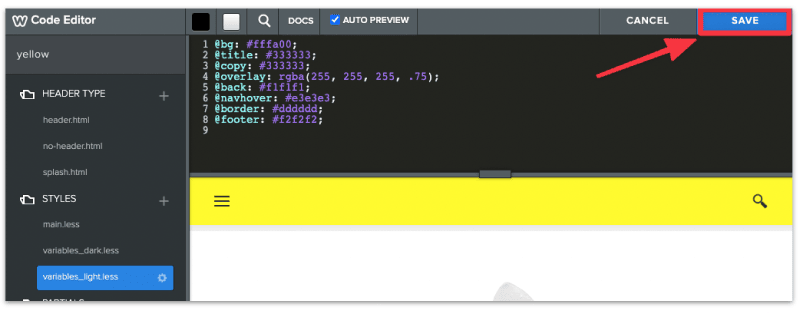
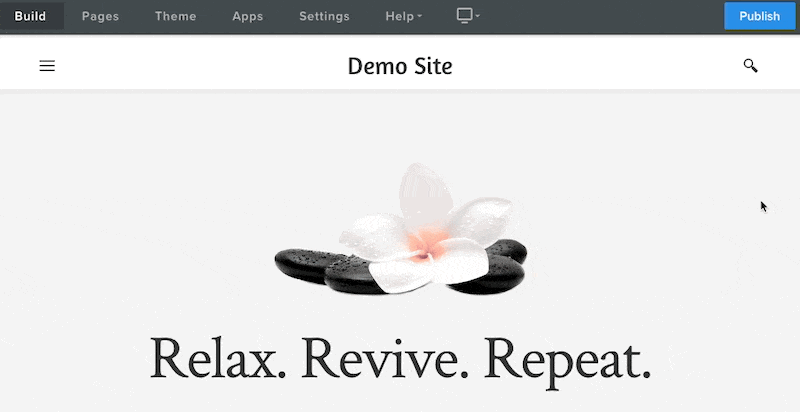
You've now successfully updated the header color!
Some Weebly themes have the search feature enabled by default.
And for those themes you can customize whether to show or hide the search icon in the header.
In the main editor, hover your mouse to the search icon.
You will see a floating menu with the options to show or hide the search icon.
Click the Hide button to disable search on your site.
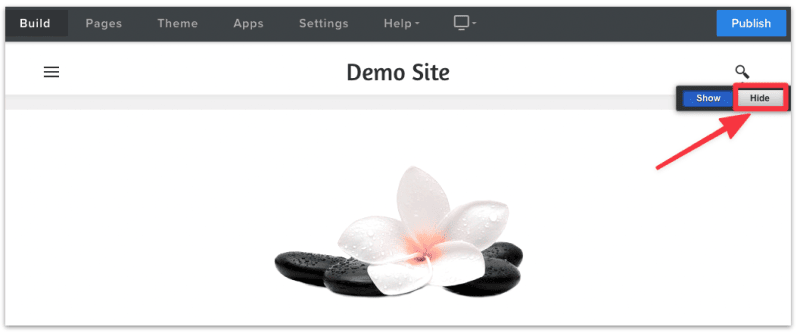
Remember to Publish your site to view the changes live.
David Nge is the founder and writer behind MakingThatWebsite.com. Since launching in 2021, he’s been on a mission to help non-techies—especially small business owners—build better websites using easy-to-learn tools and smart, time-saving strategies. He specializes in website builders, SEO, and practical AI tutorials for small business owners.
Have a tutorial you want to learn? Leave a suggestion here.